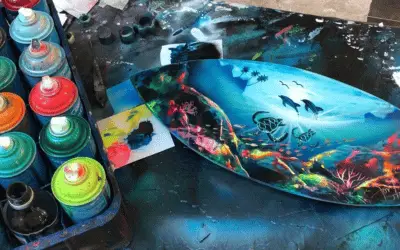
Acrylic paint is a fantastic way to bring your creative ideas to life. Its versatility and range of vibrant colors makes it perfect for any artistic or decorative purposes.�?
Whether you’re splashing some color on canvas, brightening up a piece of furniture, or simply giving old items a new lease of life – acrylic paint offers the perfect opportunity to make something unique and exciting.�?
But have you ever wondered if it’s possible to spray acrylic paint? Through this blog post, we will explore the possibilities of acrylic paint can be sprayed.
What is Acrylic Spray Paint?
Acrylic spray paint is a type of paint that is formulated with acrylic polymers and designed for use with a spray gun or aerosol can.�?
It consists of finely ground pigment particles suspended in a liquid acrylic binder, allowing easy application and fast drying.�?
Acrylic spray paint is known for its versatility and wide range of applications, including on various surfaces such as wood, metal, plastic, and canvas. It offers excellent coverage, vibrant colors, and a durable finish.�?
It is popular among artists, DIY enthusiasts, and professionals alike for its ease of use and ability to create smooth, even coats with a spray application.�?
Can You Spray Acrylic Paint?
Yes, acrylic paint can be sprayed using various sprayers such as airbrushes, HVLP spray guns, compressed air sprayers, spray cans, electrostatic sprayers, and airless sprayers. Spraying acrylic paint provides smooth application, even coverage, and the ability to create different artistic effects. It is a popular method for painting surfaces and creating art.
How to Make Acrylic Paint Sprayable
Making acrylic paint sprayable involves thinning the paint to achieve a suitable consistency. By following a step-by-step process, you can prepare the paint for spraying, ensuring smooth flow and preventing clogs in the nozzle.
Thin Acrylic Paint: Step-by-Step Guide
Step 1: Choose the right thinning medium
To achieve the ideal consistency for spray application, it’s important to select the appropriate thinning medium for your acrylic paint.�?
Options include water, acrylic paint thinners, or specific acrylic mediums designed for thinning purposes. The choice depends on the desired viscosity and the type of spray equipment you’ll be using.
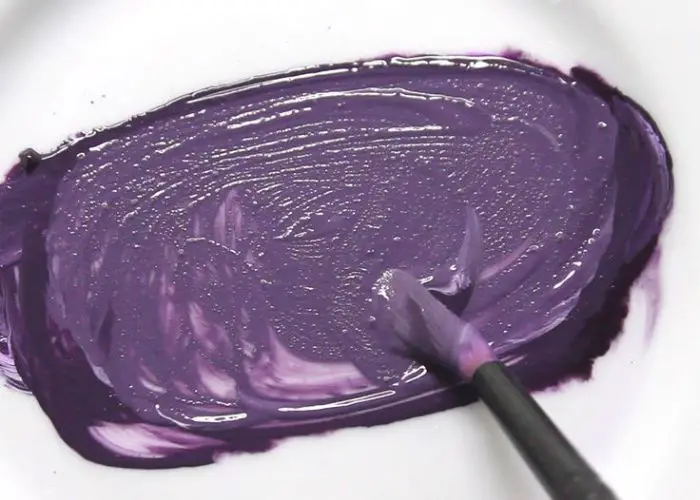
Step 2: Mix the paint and thinning medium
Gradually add the thinning medium to the acrylic paint. Start with small amounts and mix thoroughly.�?
It’s possible to achieve a uniform blend if you shop for some of the best acrylic paint, ensuring that the paint and medium are well incorporated. Continue adding the thinning medium until you reach the desired sprayable consistency.
Step 3: Test the consistency
Before proceeding to spray the paint, test its consistency. Apply a small amount of the thinned paint on a scrap surface or piece of paper. Observe the flow and texture of the paint.�?
If it sprays smoothly without clogging or creating splatters, you have achieved the right consistency. Otherwise, adjustments may be needed.
Step 4: Adjust the ratio
In case the tested paint consistency is not optimal, make further adjustments. If the paint is too thick, add more thinning medium or water in small increments and mix well.�?
If the paint is too thin, add a small amount of undiluted paint to thicken it. Continuously test the paint until you achieve the desired sprayable consistency.
Step 5: Strain the paint
To ensure a smooth spray application and prevent clogs or particles from obstructing the nozzle, it’s advisable to strain the thinned paint.�?
Use a fine mesh strainer or a nylon stocking to remove any impurities or lumps that may be present in the paint mixture. This step helps maintain the quality of the spray and prevents potential blockages.
Ways to Spray Acrylic Paint
i. Airbrush
Airbrushes are commonly used for precise and detailed spraying of acrylic paint. They provide excellent control over paint flow and allow for intricate designs.�?
Airbrushes are versatile tools suitable for various applications, from fine art to model painting.
How to use an airbrush
Step 1: Prepare your airbrush and acrylic paint by ensuring they are clean and free of any residue. Fill the airbrush paint cup with the desired color.
Step 2: Adjust the air pressure on your compressor to the recommended range for acrylic paint. Start with a lower pressure setting and gradually increase if needed.
Step 3: Hold the airbrush at a consistent distance from the surface, typically 6-8 inches (15-20 cm) away.
Step 4: Begin spraying by pressing down on the trigger or button, releasing a fine mist of paint. Move the airbrush smoothly and evenly across the surface, applying light layers.
Step 5: Overlap each pass slightly to achieve even coverage. Build up the paint gradually to avoid drips or pooling.
Step 6: Continue spraying until you achieve the desired result, taking breaks to clean the airbrush if necessary.
Pros of using an airbrush
- Precise and detailed spraying capability.
- Excellent control over paint flow and application.
- Versatility for various applications and artwork.
- Ability to create intricate designs and fine lines.
- Smooth and even coverage.
Cons of using an airbrush
- Steeper learning curve and technique mastery.
- Requires additional equipment (compressor, airbrush, etc.).
- Time-consuming for larger surface areas.
- Potential for clogging or blockage.
- Higher initial investment cost.
ii. HVLP Spray Gun
HVLP (High Volume Low Pressure) spray gun is popular for spraying acrylic paint on larger surfaces.�?
The paint gun provides high transfer efficiency and a fine atomization of paint, resulting in a smooth and even finish. HVLP guns are often used in automotive spray painting and furniture refinishing.
How to use HVLP spray gun
Step 1: Dilute your acrylic paint to the recommended viscosity for your specific HVLP spray gun. Follow the manufacturer’s instructions for proper thinning ratios.
Step 2: Fill the paint cup of the spray gun with the thinned paint.
Step 3: Adjust the air pressure on your compressor to the recommended range for your HVLP gun. Lower pressure settings are usually preferred for acrylic paint.
Step 4: Hold the spray gun at a consistent distance from the surface, typically 6-10 inches (15-25 cm) away.
Step 5: Start spraying by pulling the trigger, releasing a controlled flow of paint. Move the spray gun smoothly across the surface, using overlapping passes for even coverage.
Step 6: Maintain a steady pace to prevent paint buildup or drips. Adjust the air pressure or flow rate as needed to achieve the desired spray pattern and coverage.
Step 7: Clean the spray gun thoroughly after use to prevent clogging and ensure proper functioning for future projects.
Pros of using an HVLP spray gun
- Higher transfer efficiency and paint savings.
- Provides a professional and even finish.
- Suitable for larger surface areas.
- Versatility for various applications (automotive, furniture, etc.).
- Reduced overspray compared to conventional spray guns.
Cons of using an HVLP spray gun
- Higher initial investment cost.
- Requires a compressor and additional equipment.
- May require more skill and practice for optimal results.
- Longer application time compared to airless sprayers.
- Limited portability compared to spray cans or airbrushes.
Speed and control for HVLP
When using an HVLP (High Volume Low Pressure) spray gun, achieving the right balance of speed and control is essential for optimal results.�?
The speed at which you move the gun and the control you exert over the spray pattern greatly influence the paint application and the overall finish.�?
Maintaining a consistent and appropriate speed while using an HVLP spray gun is crucial. Moving too slowly can lead to excessive paint buildup, resulting in drips or runs.�?
On the other hand, moving too quickly may cause uneven coverage and a patchy finish. Aim for a moderate, steady speed to ensure an even coat of paint while avoiding excess buildup.
Consequently, controlling the spray pattern is vital for achieving the desired results. HVLP spray guns provide better control compared to other spray methods due to their lower pressure.�?
Here are a few tips for maintaining control
- Hold the spray gun with a firm grip, keeping it steady and level throughout the spraying process.
- Maintain a consistent distance between the spray gun and the surface being painted. This helps control the spray pattern and ensures even coverage.
- Use smooth and even strokes while moving the spray gun across the surface. Avoid jerky or erratic movements, as they can result in uneven paint distribution.
- Practice proper trigger control by modulating the amount of paint released with the trigger. This allows you to adjust the flow for better control over the coverage.
iii. Compressed Air Sprayer
Compressed air sprayers, such as conventional spray guns, are another option for spraying acrylic paint.�?
They use compressed air to atomize and propel the paint onto the surface. These sprayers can cover larger areas quickly but may require more skill to achieve optimal results.
How to use a compressed air spray
Step 1: Prepare your compressed air sprayer by attaching the paint container or reservoir and connecting it to the air supply.
Step 2: Fill the paint container with properly thinned acrylic paint.
Step 3: Adjust the air pressure on the sprayer to the recommended range. Consult the manufacturer’s instructions for specific pressure settings.
Step 4: Hold the sprayer at a consistent distance from the surface, typically 8-12 inches (20-30 cm) away.
Step 5: Begin spraying by pressing the trigger or button, releasing a steady flow of paint. Move the sprayer smoothly across the surface, using overlapping strokes for even coverage.
Step 6: Maintain a constant speed and distance from the surface to ensure consistent application. Adjust the air pressure or paint flow as needed for optimal results.
Step 7: Clean the sprayer thoroughly after each use, following the manufacturer’s instructions, to prevent clogs and maintain its performance.
Pros
- Ability to cover larger areas quickly.
- Versatile for various projects and surfaces.
- Effective for achieving a smooth and even finish.
Cons
- Requires a compressor and additional equipment.
- May require more skill and practice for optimal results.
- Potential for overspray and paint wastage
iv. Spray Cans
Spray cans filled with pre-mixed acrylic paint are convenient for small projects or touch-ups. They offer simplicity and ease of use, requiring no additional equipment.�?
However, spray cans may have limited color options, and the spray pattern may not be as controllable as with other spray methods.
How to use spray cans
Step 1: Shake the spray can vigorously for a few minutes to ensure proper mixing of the acrylic paint inside.
Step 2: Hold the can approximately 6-8 inches (15-20 cm) away from the surface you want to paint.
Step 3: Press the nozzle down firmly to release the paint. Start spraying in a controlled manner, moving the can back and forth across the surface.
Step 4: Maintain a consistent distance and speed to achieve even coverage. Apply multiple light coats rather than a single heavy coat to prevent drips or runs.
Step 5: Although you can make spray paint dry faster, allow each coat to dry according to the instructions on the can before applying additional coats if needed.
Step 6: After use, turn the can upside down and press the nozzle until clear gas comes out. This helps clear the nozzle and prevent clogging.
Pros
- Easy to use, no additional equipment required.
- Suitable for small projects or touch-ups.
Cons
- Limited color options and spray pattern control.
- Can be more challenging to achieve an even finish.
- Limited coverage area per can.
v. Electrostatic Paint Sprayer
Electrostatic sprayers apply a positive charge to the paint particles and the target surface, creating an attraction that results in efficient paint deposition.�?
These sprayers are commonly used in industrial applications, providing high transfer efficiency and reducing overspray.
How to use electrostatic sprayer
Step 1: Ensure that your electrostatic sprayer is properly set up and charged according to the manufacturer’s instructions.
Step 2: Fill the sprayer’s reservoir with properly thinned acrylic paint, following the recommended ratios.
Step 3: Hold the sprayer nozzle approximately 12-18 inches (30-45 cm) away from the surface you wish to paint.
Step 4: Begin spraying while keeping the nozzle parallel to the surface. Move the sprayer in a slow, sweeping motion, covering the entire area.
Step 5: Ensure that the charged paint particles are evenly attracted to the target surface, resulting in uniform coverage. Maintain a consistent distance and avoid excessive overspray.
Step 6: Clean the sprayer thoroughly after use to remove any leftover paint and prevent clogs or buildup.
Pros
- High transfer efficiency and reduced overspray.
- Uniform coverage and excellent adhesion.
- Suitable for large-scale industrial applications.
Cons
- Requires specialized equipment and setup.
- Higher initial investment cost.
- More complex operation and maintenance.
vi. Airless Sprayer
Airless sprayers use a high-pressure pump to force paint through a small orifice, breaking it into fine droplets.�?
They are effective for large-scale projects and offer fast coverage. Airless sprayers are commonly used in commercial painting, construction, and exterior applications.
How use an airless prayer
Step 1: Prepare your airless sprayer by attaching the paint reservoir and ensuring it is properly filled with thinned acrylic paint.
Step 2: Set the pressure on the sprayer according to the manufacturer’s guidelines for acrylic paint.
Step 3: Hold the spray gun at approximately 12-18 inches (30-45 cm) from the surface.
Step 4: Begin spraying by pulling the trigger, releasing a high-pressure stream of paint. Move the spray gun in long, even passes across the surface, overlapping each stroke.
Step 5: Ensure even coverage by maintaining a steady pace and consistent distance from the surface.
Step 6: Clean the sprayer thoroughly after use by flushing it with an appropriate cleaning solution, following the manufacturer’s instructions.
Pros
- Fast coverage for large-scale projects.
- Suitable for various coatings and thicker paints.
- Versatile for both indoor and outdoor applications.
Cons
- Potential for overspray and paint wastage.
- Requires proper pressure adjustment for optimal results.
- Limited control over the spray pattern compared to other sprayers.
Common Problems When Spraying Acrylic Paint (+ Fixes)
When spraying acrylic paint, several common problems may arise. Here are some of the common problems and�? fixes to address them:�?
Clogging
Clogging occurs when the spray nozzle gets blocked, preventing a smooth flow of paint. This can happen due to paint particles or debris in the paint or improper thinning.�?
How to fix it
To fix this issue, you can try cleaning the nozzle by wiping it with a cloth or using an appropriate cleaning solution. Additionally, ensure that the paint is properly thinned to the recommended consistency for spraying, as thick paint is more likely to cause clogs.
Orange Peel Effect
The orange peel effect refers to a textured, bumpy appearance on the painted surface that resembles the skin of an orange.
This happens when the paint is applied too heavily or if the air pressure is too high, causing it to dry before it settles smoothly.�?
How to fix it
Adjust the air pressure to a lower setting and apply lighter coats of paint. Moreover, ensure proper thinning and maintain a consistent distance from the surface while spraying.
Paint Sagging or Running
Paint sagging or running occurs when the paint forms drips or runs down the surface due to excessive application or improper spraying technique. This can lead to uneven coverage and an unprofessional finish.�?
How to fix it
Thin paint coats, allowing each coat to dry before applying the next. Maintain an appropriate distance from the surface and use smooth, even strokes while spraying. If sagging occurs, you can try lightly sanding the affected area and reapplying the paint.
Dry Spray
Dry spray refers to a powdery or grainy texture on the painted surface caused by the paint drying before it reaches the surface properly. It is caused by improper air pressure, incorrect nozzle size, or spraying from too far away.�?
How to fix
To resolve this problem, ensure the air pressure is correctly set for the paint and equipment being used.
Check if the nozzle size is appropriate for the paint viscosity. Spray from a closer distance to ensure proper paint coverage and adhesion to the surface.
Fisheyes
Fisheyes are small, crater-like imperfections on the painted surface, often caused by surface contamination or incompatible materials. It can occur if the surface has oil, grease, or silicone residue that repels the paint.�?
How to fix it
Clean the surface thoroughly before painting to remove any contaminants. If fisheyes still occur, using a fisheye eliminator or adding a small amount of silicone-free flow improver to the paint can help improve paint adhesion and prevent fisheye formation.�?
Precautionary Measures When Spraying Acrylics Paint
The following�? precautionary measures should be observed when spraying acrylic paint:
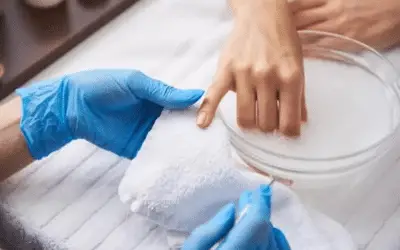
Wear Protective Gear
It is important to wear appropriate protective gear when spraying acrylic paint. This includes safety goggles or glasses to protect your eyes from paint particles, a respirator or mask to prevent inhalation of fumes or airborne particles, and gloves to shield your hands from potential skin irritation.�?
Proper protective gear helps ensure your safety and reduces the risk of exposure to harmful substances.
Work in a Well-Ventilated Area
Spraying acrylic paint releases fumes and airborne particles, which can be hazardous if inhaled in high concentrations. Therefore, it is crucial to work in a well-ventilated area.�?
Open windows and doors to allow fresh air circulation, or use fans or exhaust systems to remove fumes from the workspace. Good ventilation helps dissipate the paint fumes and maintains a safer working environment.
Use a Spray Booth
A spray booth is a specially designed enclosure that contains and exhausts fumes and overspray, providing a controlled environment for spraying.�?
Spray booths help to minimize the dispersal of paint particles, improve air quality, and reduce the risk of inhalation or contamination in the surrounding area.
Follow Manufacturer’s Instructions
Always follow the manufacturer’s instructions when using acrylic paint and spray equipment.
Each paint brand and spray device may have specific guidelines and recommendations for usage, thinning ratios, air pressure settings, and cleaning procedures.
Adhering to these instructions ensures proper application, reduces the risk of accidents, and helps maintain the longevity of the equipment.
Clean Up Properly
After spraying acrylic paint, clean up the equipment properly. Flush the spray gun or airbrush with an appropriate cleaning solution, following the manufacturer’s instructions.�?
Remove any excess paint from the nozzle or needle, and thoroughly clean all parts. Proper cleaning prevents paint build-up, clogging, and potential damage to the equipment.
Work in a Well-Ventilated Room
Ensure that the room itself has sufficient ventilation. This includes having windows or vents allowing air exchange and removing fumes.�?
Adequate ventilation reduces the concentration of airborne particles, helps maintain a safer working environment, and improves overall air quality in the room.
Read also: What happened to atm Las Vegas?
FAQs
Can acrylic paint be sprayed?
Yes, acrylic paint can be sprayed. It is a versatile medium that can be used with different sprayers such as airbrushes, HVLP spray guns, compressed air sprayers, spray cans, electrostatic sprayers, and airless sprayers. Spraying acrylic paint allows for smooth application, even coverage, and the ability to create various artistic effects.
Next, you may be interested to know what paint sticks to spray paint.
Can you use acrylic paint in a sprayer?
Yes, you can use acrylic paint in a sprayer, although you have to ensure that the paint is appropriately thinned for optimal spray application. Acrylic spray paints that are too thick can clog the nozzle and result in an uneven spray pattern. Thinning the paint to a suitable consistency achieves smoother and more controlled spraying.
Should you thin acrylic paint for spraying?
Yes, thinning acrylic paint is generally necessary for spraying. Acrylic paint straight out of the tube or bottle is often too thick for effective spraying, as it can lead to clogs and uneven application. If you are thinking of how to smooth acrylic painnt, thinning the paint with water or an appropriate acrylic medium gives you a more fluid consistency that allows for smooth spraying and even coverage.
Can you spray acrylic paint with a spray bottle?
While it is possible to spray acrylic paint with a spray bottle, it is not ideal for achieving professional and controlled results. Spray bottles typically produce a coarse mist, making it difficult to achieve a fine, even spray pattern. Plus, the spray bottle may not provide consistent pressure and can cause splatters.
Can I dilute acrylic paint with water?
Yes, you can dilute acrylic paint with water. Water is a commonly used medium for thinning water-based paints like acrylic, especially for beginners or those on a budget. Mix acrylic paint and water gradually while stirring until you achieve the desired consistency. However, excessive water dilution may affect the paint’s adhesion and color intensity.
How do you make acrylic paint flow better for spraying?
To make acrylic paint flow better for spraying, thin the paint with water or an acrylic medium. Gradually add the thinning agent while stirring until the desired consistency is achieved. Test the flow and adjust as needed. Use spray equipment with adjustable air pressure and practice proper spraying techniques for even coverage.
What is the best solvent to thin Acrylic paint?
Water itself is the most commonly used medium to thin latex paint, where acrylic paint belongs. However, if you want an alternative to water, you can use specific acrylic mediums designed for thinning, such as acrylic flow improvers or airbrush mediums. These mediums are formulated to maintain the paint’s integrity while thinning it for optimal spraying.�?
Recap
Spraying acrylic paint is possible, although it will require specialized knowledge and equipment. You’ll need something that produces a fine mist.�?
The process may seem daunting initially, but with patience and careful preparation, anyone can learn to paint with spray-on acrylics. In conclusion, why not try your hand at spraying acrylic paint?
I am sure you won’t be disappointed by the results – not only will your artwork turn out highly professional and impressive looking, but you’ll also have had a great time doing it.�?
Gather some supplies and let your creative juices flow.�?


Leave a Reply