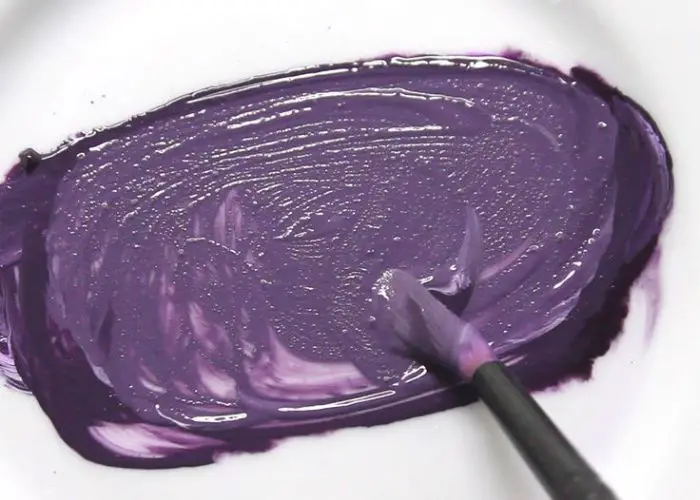
If you’re an artist who loves creating acrylic pour paintings but doesn’t have access to Floetrol, don’t worry.
You can use a floetrol substitute to achieve beautiful results. You can make stunning acrylic artwork if you understand the principles of pouring techniques and experiment with different mixtures.
You don’t have to use expensive pouring mediums. You can use PVA glue or water to achieve the right paint consistency.
We live off art; floetrol is not always our go-to pouring medium. We’ll list the floetrol substitutes, but before that, let’s understand what floetrol is.
How to Mix Acrylic Paint for Pouring Without Floetrol
Use Elmer’s Glue, along with water. Adding a small amount of water to dilute the glue can achieve a pouring consistency similar to Floetrol. When using Elmer’s Glue-all, your artwork will dry to a matte finish, much like Floetrol.
What is Floetrol?
Floetrol is a brand name for a type of paint additive artists use as a pouring medium for acrylic paint.
It helps to improve paint consistency, making it easier to pour and manipulate on the canvas.
Floetrol slows down the drying time of the paint, allowing artists more time to create desired patterns.
Also, it helps to reduce brush marks and roller marks, resulting in a smoother and more even finish.
What is Floetrol Made Of?
Floetrol is a paint additive made of a synthetic polymer called ethylene-vinyl acetate (EVA).
EVA is a copolymer that combines ethylene and vinyl acetate monomers. This polymer acts as a binder and thickening agent in the paint, improving its leveling properties.
It also contains other additives, such as surfactants and defoamers, which help to enhance its performance and compatibility with acrylic paints.
These additional ingredients help to reduce surface tension and prevent bubbles from forming during the paint-pouring process.
Is floetrol discontinued
The Flood Floetrol Latex Paint Additive has been discontinued by Akzo Nobel Paints LLC, which is a subsidiary of PPG Industries, Inc.
Floetrol Substitute – What Can You Use Instead of Floetrol for Acrylic Pouring?
Though you need a good pouring medium when doing acrylic pour painting, it does not have to be particularly Floetrol. Here are the best floetrol alternative pouring mediums.�?
Elmer’s Glue
Elmer’s Glue can be an economical alternative to Floetrol, offering a lower-cost option apart from water.
Adding a small amount of water to dilute the glue can achieve a pouring consistency that resembles Floetrol’s.
Your project will dry to a matte finish if you use Elmer’s glue. It could be the best-pouring medium compared to other pouring mediums because it is cost-effective. So, it is an affordable option even for those on a budget.
On top of that, you can thin it with water or mix other pouring mediums to create your unique pouring medium mix.
It works excellently as a pouring medium and provides superb cells when used with silicone oil.
Also, you can easily find it in craft stores, office supply stores, and even some supermarkets, making it easily accessible for most people.
Elmer’s glue all has superb adhesive properties, just like water-based acrylics.�?
Remember that it is primarily designed to adhere materials together. If you use it as a Floetrol substitute in a painting project, it could improve paint adhesion.
Elmer’s Glue pros
- Easily available
- It has excellent adhesive properties
- It is affordable
�?Elmer’s Glue Cons�?
- When the paint dries, it has a matte finish, which may make your colors appear dull. To restore the shine, applying a varnish coat is recommended.
- Its acidic nature can cause yellowing in acrylic pours, particularly those with a significant amount of white.
- So, it might not be the most appropriate acrylic pour for artworks where white is prominent.
Liquitex�?
Liquitex pouring medium is a pouring medium that consistently delivers exceptional results and is among my top choices.
The Liquitex pouring medium provides a beautiful shine to my paintings when it dries, eliminating the need for an additional coat of varnish as long as I use the gloss pouring medium.
Liquitex’s pouring medium is a popular professional pouring medium as it has a natural gloss finish which provides a gorgeous shine on your pour painting.
Many artists use�? Liquitex pouring medium because it Improves paint flow.
Liquitex pouring medium is a paint conditioner specially formulated to improve the flow and levelling of acrylic paints.
It helps paints glide smoothly across the surface, resulting in uniform coverage.
This is helpful for techniques like acrylic pouring, where you must achieve a smooth, consistent flow.�?
Also, It preserves the pigment intensity, allowing them to remain vivid after drying. This ensures that your artwork retains its visual appeal over time.
It also has a relatively fast drying time compared to other pouring mediums.
This is handy when working on time-sensitive projects or layering multiple colors, as it minimizes the risk of color blending and smudging.
Liquitex is a reputable brand known for producing high-quality art materials. It could be your product if you want an artist-quality acrylic pouring medium.�?
Pros�?
- It is a good-quality pouring medium
- Faster drying time
- Preserves color brilliance
Cons
- It is pricey if you are operating on a shoestring budget
Lineco neutral pH adhesive
Lineco Neutral PH adhesive is a white pH-neutral PVA adhesive that adheres to most porous surfaces.�?
The good news is that you can use it as a floetrol substitute, and it won’t cause discoloration, yellowing, or degradation of your artwork over time, making it suitable for fluid painting.
It is one of the best alternative pouring mediums available with the DecoArt pouring medium.�?�?
If you need a pouring medium closely related to Elmer’s glue but offers archival qualities, Lineco Neutral pH Adhesive could be the ideal choice.
This acid-free adhesive glue is available at a reasonably affordable price, making it a cost-effective option.
You can thin paint with distilled water to achieve your desired smooth consistency.
You could also mix it or mix it with other pouring mediums for acrylic pour painting.
It works like a charm with different pouring techniques. The formula can produce large cells with a few drops of silicone.
The product is a great pouring medium for making canvas panels for plein air painting.
Though it is pricier than mod podge, it makes up for it in quality and effectiveness.�?
So, it is worth every penny if you want nothing but the best pouring medium.
Pros�?
- It’s a neutral PH- so your paint project won’t turn yellow as time passes.
- Excellent archival qualities
- You can thin it with water
Cons
- It is costly if you are struggling financially
- Dries to a matte so your paint project could look dull unless you use a�? top coat varnish to make them glossy.
Mod podge
Mod Podge is a popular all-in-one sealer, glue, and finish used in craft and decoupage projects.
Although it is not specifically formulated as a pouring medium like Floetrol, you can still use it for pouring techniques with some adjustments.
Mod Podge is the best alternative pouring medium.�? It is reasonably priced and offers a glossy finish to your artwork.
You can also use it by incorporating a small amount of water or blending it with various pouring mediums of your preference.
To use Mod Podge as a pouring medium, you’ll need
- Acrylic paint
- Mod Podge (matte or glossy, depending on your preference)
- Water
- Mixing cups
- Stirring sticks or palette knives
- Canvas or another painting surface
- Pouring container ( plastic cup)
- Disposable gloves
- Plastic sheet or drop cloth (to protect your workspace
To use Mod podge and be happy with the results, start by covering your work surface with a plastic sheet or drop cloth to protect it from spills or drips.
Mix acrylic paint with Mod Podge in a mixing cup. Start with a 1:1. Adjust the amounts based on your desired color intensity and the size of your project.
Gradually add water to the paint and Mod Podge mixture. Start with a small amount, such as a teaspoon, and stir well.
Continue adding water while stirring until you reach the desired pouring consistency.
The mixture should flow easily without being too runny or too thick.
Mix thoroughly with a stirring stick or palette knife to ensure no lumps or clumps in the mixture. It might take time to achieve a smooth, consistent blend.
Dip a stirring stick into the mixture to test the consistency and lift it out.
The mixture should flow off the stick in a steady stream and create a mound on the surface before sinking back in.
Adjust the consistency by adding more Mod Podge or water as needed.
Once you’ve achieved the desired consistency, pour the mixture onto your canvas or painting surface.
You can use various pouring techniques like a dirty pour, flip cup technique, or swipe to create different effects.
Experiment and have fun with different pouring methods and mediums to see what works best for your desired outcome.
Tilt your canvas in different directions to allow the mixture to flow and spread across the surface.
You can also use a palette knife or other tools to manipulate the paint and create interesting patterns or textures.
Allow your artwork to dry completely. The drying time will vary depending on the thickness of the paint and the environmental conditions.
Once dry, Mod Podge will provide a transparent, glossy, or matte finish, depending on the variant you use. Mod podge drying time can depend on a few factors including the density of your application, air flow and humidity.
GAC 800
GAC 800 is an acrylic medium produced by Golden Artist Colors, a well-known manufacturer of artist-quality acrylic paints and mediums.
GAC stands for Golden Artist Colors, and the “800” refers to the product number.
It is a great pouring medium in acrylic pouring techniques, such as the popular fluid or acrylic pouring art.
It improves acrylic paints’ flow and levelling properties, allowing you to pour them more easily on different surfaces.�?
Ensure that your studio is well-prepared for pouring techniques by paying attention to temperature, cleanliness, and having a levelled work table.�?
For best outcomes, seal your surface using a gloss medium before applying mixtures containing GAC 800.
Allow the mixtures to rest so that the foam can escape. After applying a layer of GAC 800, it is important to let it dry for at least 24 hours (and even longer before adding any additional products. Ideally, wait for three days.
It’s worth noting that thinner films are less likely to develop cracks or crazing.
By using GAC800, you can significantly minimize crazing in your pours. Let the pour dry under a “tent” or cover for minimal defects.
Pros
- Available in matte,�? gloss, and iridescent finishes.
- Specifically formulated to work with acrylic paints.
- Your artwork is archivable.
- It will give your paintings a glossy finish (if you opt for gloss medium), so there is no need to buy a varnish.
�?Cons
- It costs a lot, but the paint quality is second to none
Pebeo Studio Acrylics Pouring Medium
Sargent Art Pouring Acrylic Medium
Other Pouring Medium Alternative
You can also use the following things in place of Floetrol. You’ll still enjoy improved flow, increased open time, and reduced crazing.
Using pre-mixed pouring paints
Using pre-mixed pouring paints as a Floetrol substitute eliminates the need to measure and mix other mediums, making it a convenient choice if you want a simpler acrylic pouring experience.
Examples of pre-mixed pouring paints that can serve as substitutes for Floetrol in acrylic pouring are�?
- Mont Marte Studio Acrylic Pouring Paints:
- Golden High Flow Acrylics
- DecoArt Fluid Art Ready-to-Pour Acrylics
Each brand may have its unique characteristics. Experiment and find the one that best suits your artistic preferences.�?
You’ll need pre-mixed pouring paints, a pouring surface (such as a canvas or panel), mixing cups, stirring sticks, and any additional tools you prefer to create desired effects (e.g., palette knives and blow dryer).
Cover your workspace with a plastic sheet or drop cloth to protect it from paint spills.
Place your pouring surface on the covered area. Shake the pre-mixed pouring paints to ensure the pigments are well-mixed.
To create multi-colored effects, pour different colors of pre-mixed pouring paints into separate mixing cups.
You can also create a single cup with different colors layered for a marbled effect.
Pour the paint onto the surface: Tilt the cup or pour directly from the mixing cup onto the centre of your pouring surface.
Allow the paint to flow naturally. Tilt the surface gently in different directions to encourage the paint to flow and cover the entire surface.
Use palette knives or blow dryers on a low setting to manipulate the paint and create interesting patterns and effects.
Once satisfied with the composition and effects, set aside the painting in a clean, dust-free area. Allow it to dry completely.�?
Water
Water is one of the best pouring mediums for acrylic pouring techniques because it is affordable and readily available, does not change the paint intensity, and dries quickly.�?
Use water as a medium for acrylic pouring. Start by squeezing the paint onto a palette or palette paper.
Gradually add small amounts of water to the paint, stirring and mixing thoroughly after each addition.
Continue adding water and mixing until you achieve the desired consistency.�?
The paint should be thin enough to flow easily but not excessively diluted.
Test the paint’s consistency by lifting a stirring stick or palette knife and observing how the paint drips off.
It should form a steady, continuous stream without being too thick or too runny.
If the paint is too thick, add more water and mix again. If it becomes too thin, add a small amount of paint to thicken it up.
Once satisfied with the consistency,�? proceed with your chosen acrylic pouring technique, pouring the water-thinned paint onto the canvas or surface.
Tilt the surface gently to allow the paint to flow and create desired effects.
Use additional tools like palette knives or blow dryers on a low setting to manipulate the paint if desired.
Allow the artwork to dry thoroughly according to the recommended drying time for your specific acrylic paint brand.
Use Acrylic Retarder
Acrylic retarder is an additive used in acrylic painting to slow the drying time of acrylic paints.
It is a clear liquid you can mix with acrylic paints or apply directly to the painting surface. Examples include
- Sax True Flow Acrylic Drying Retarder
- Vallejo Acrylic Paint Retarder
- Tamiya USA Paint Retarder
Put the paint onto a palette or palette paper. Add a small amount of acrylic retarder and mix thoroughly.
The amount of retarder will depend on desired drying time and the brand’s instructions.
Test the consistency and drying time of the paint by lifting a stirring stick or palette knife and observing how the paint drips off.
Adjust the amount of retarder if necessary to achieve the desired flow.
Once satisfied with the consistency, proceed with your chosen acrylic pouring technique.
Tilt the surface gently to allow the paint to flow and create desired effects. Use additional tools, palette knives, or blow dryers on a low setting to manipulate the paint.
Allow the artwork to dry based on the recommended drying time for your specific acrylic paint pouring brand.
A retarder may affect the paint film’s drying time and surface quality.
What is The Best Paint Leveler Substitute?�?
The best substitute for a paint leveler is a high-quality primer. Primers create a smooth, even surface, covering surface imperfections and providing a uniform base for the paint.
Also, they help to level out uneven textures and promote better paint adhesion of the paint.
Additionally, it minimizes the appearance of brushstrokes and other surface irregularities.
It is important to choose a primer compatible with the type of paint you plan to use and follow the manufacturer’s instructions for application and drying times.
Understanding the Color Wheel Theory For Mixing Acrylic Paint�?
Color theory is a concept that explains how colors interact with each other and how the human eye perceives them.
It explores the relationships between colors, their properties, and their psychological effects.
The primary components of color theory are the color wheel, color harmony, color contrasts, and color symbolism.
The color wheel is a circular representation of colors, consisting of primary colors (red, blue, and yellow), secondary colors (orange, green, and purple), and intermediate colors (created by mixing primary and secondary colors).
Color harmony refers to the beautiful arrangement of colors in a composition.
Different color schemes like complementary (opposite colors on the color wheel), analogous (adjacent colors), or monochromatic (variations of a single color) can be used to create harmonious effects.
Colors can evoke emotions, convey messages, and have cultural significance.
Understanding color theory can help you make informed choices about color combinations, create visual balance, and effectively communicate through color.
Interesting read: Acrylic tank manufacturing reviews.
How to Mix Acrylic Paints: An Artist’s Reliable Guide to Creating Colors
Color mixing may appear daunting initially, but you can enhance your artwork significantly with some knowledge and practice.
Here are a few tips to help you in your journey.
To achieve greater opacity and complexity, add white paint.
Opt for titanium white when selecting a white paint for mixing. It is the ideal choice for achieving higher opacity.
Titanium white is renowned for being the most opaque white paint available.
Its high viscosity also ensures excellent coverage on your painting surface, making it easier to achieve professional results.
Add brown to darken paint instead of black
When aiming for a darker color, your initial instinct might be to incorporate black paint, but that might not yield the best outcome.
Black paint contains a high concentration of pigment; even a tiny amount can rapidly darken your color, potentially resulting in a cloudy appearance or completely altering the intended hue.
Rather than using black, it is advisable to gradually add small amounts of dark blue or brown paint to your mixture.
You’ll be able to achieve the desired darker shade while maintaining color integrity.
Read: Does paint dry darker or lighter
Use primary colors to create different skin tones
Mix equal amounts of primary colors (red, yellow, and blue) to create a brown color.
Then, depending on the desired skin tone, gradually introduce additional amounts of one specific color and small quantities of dark blue, black, or white as necessary.
�?It is crucial to exercise caution when using black paint, as it is highly pigmented, so use it sparingly to avoid overpowering the mixture.
Make your colors a few shades lighter to account for the fact that they will dry darker.
One thing to remember while mixing acrylic paints is that they will dry darker than they look while wet. This is due to the high viscosity of acrylic paint.
If you want a lighter color, mix it a little lighter than you anticipate to accommodate the drying and darkening process.
Combine complementary colors to create black or dark shades�?
Combining complementary colors can result in more distinct, dark paint hues.�?
Mix yellow with violet, orange and blue, or red and green to achieve the desired warm or cool black.
Use secondary colors like phthalo green straight from the tube, or start with primary colors and combine them to get the complementary colors you want.
Floetrol vs. Water
Floetrol offers advantages over water alone. Water will merely dilute or thin the paint that you are using.
On the other hand, Floetrol is a conditioner which improves the water-based paint’s properties while making it thinner for easier application.
How much floetrol should you add to latex paint?
Add at least 4 ounces of Floetrol in each quart of paint but no more than 8 ounces. The amount is determined by the paint’s consistency and flow qualities.
Adding Floetrol to flat or semi-gloss latex paint additives will not change the color or shine.
Read also: Eggshell vs flat.
FAQS
Is floetrol a pouring medium?
Yes, Floetrol is a medium. You add a medium to acrylic paints to make them simpler to work with and to make them behave how you want them to in your applications. The medium causes the paint to act as if it has been thinned without your intervention.
What is the right floetrol to paint ratio?
Floetrol is typically combined with paint at a 20- 50 ratio. That’s a wide range, but it is a general guideline because your ratios will vary with each pour and paint mixture. When you first start using Floetrol, you can experiment with combinations to determine what works best.
How to mix floetrol with acrylic paint for pouring
Mix one part Floetrol with two parts acrylic paint. Stir the mixture thoroughly. Add two to four drops of liquid silicone. Stir the mixture extensively. Do the same for each paint color, using a different container for each color. Now, pour the colors you want into the painting layer by layer into one plastic cup.
What are the ingredients for homemade floetrol?
High-quality PVA glue acts as a binder and helps improve the paint’s flow. Distilled Water to helps avoid impurities that might affect the paint’s performance.: Isopropyl alcohol to reduce surface tension and create exciting effects like cells in the paint pour.
What is the best Golden GAC 800 substitute?
Floetrol is the best GAC 800 substitute. It is more affordable, available in most places, and works almost the same as GAC 800. Other GAC 800 substitutes include Liquitex Pouring Medium and Mod Podge. These products can enhance the flow and leveling of acrylic paints. They also help you create cells and provide a glossy finish.
What is the best marbling medium substitute?
Nail polish is a superb color medium for marbled DIY projects. However, shaving cream is the way to go for a fun and kid-friendly marbled method!
Cheaper alternative to unicorn spit
A possible cheaper alternative to Unicorn Spit is to create your own DIY stain and glaze mixture using common household items. Combine acrylic paint, water, and a clear glaze medium to achieve a similar effect. Experiment with different paint colors and ratios to achieve your desired look.
How to make Australian floetrol
Australian Floetrol is a paint conditioner similar to the original Floetrol product. To create a homemade alternative, combine equal parts of water-based acrylic paint, water, and a clear pouring medium. Mix thoroughly to achieve a smooth consistency. Experiment with different ratios and adjust as needed for desired paint flow and leveling effects.
What does floetrol do to acrylic paint?
Floetrol is a paint conditioner that is commonly used with acrylic paint. When added to acrylic paint, Floetrol improves the flow and workability of the paint, making it easier to apply and creating smoother brushstrokes. It also enhances the leveling properties of the paint, resulting in a more even and professional-looking finish.
Conclusion�?
Although Floetrol is a popular pouring medium, plenty of substitutes can help you achieve stunning results.
Whether it’s Liquitex Pouring Medium, water, or Mod Podge, these alternatives offer the magic of improved flow, mesmerizing cells, and a glossy finish. Don’t let the lack of Floetrol hold you back.
Embrace the possibilities, experiment with different ratios, and discover your own unique pouring medium that will unleash your artistic vision.
Pour, create, and let your colors dance with these captivating substitutes. The pouring world is yours to explore!


Leave a Reply