Do you want to learn how to tie dye with acrylic paint? It is a great way to add some color and creativity to your wardrobe.
You can also use acrylic paint to tie dye fabric for projects like pillows, placemats, or even a t-shirt.
This blog post will discuss how to tie dye with acrylic paint and show you some examples of what you can create!
Can You Tie Dye with Acrylic Paint?
Yes, you can tie dye with acrylic paint. The key is to ensure that you use the right ratio of paint to water. If you use too much paint, the colors will be very concentrated and may bleed. If you use too little paint, the colors will be more subtle and may not take as well to the fabric.
Does Acrylic Paint Tie Dye Last?
The answer is yes and no. Acrylic paint tie dye can last for a long time if you take proper care of it.
But if you don’t, it will start to fade and chip away relatively quickly. As you know, acrylic paint tie dye is not permanent.
It will eventually fade and bleed over time. However, it is possible to extend the life of your tie dye by taking proper care of it.
Here are a few tips:
- Wash your tie dye in cold water with a mild detergent.
- Hang your tie-dye to dry in a well-ventilated area.
- Avoid exposing your tie dye to direct sunlight.
Related Read: Does Acrylic Paint Wash Off Clothes After It Dries
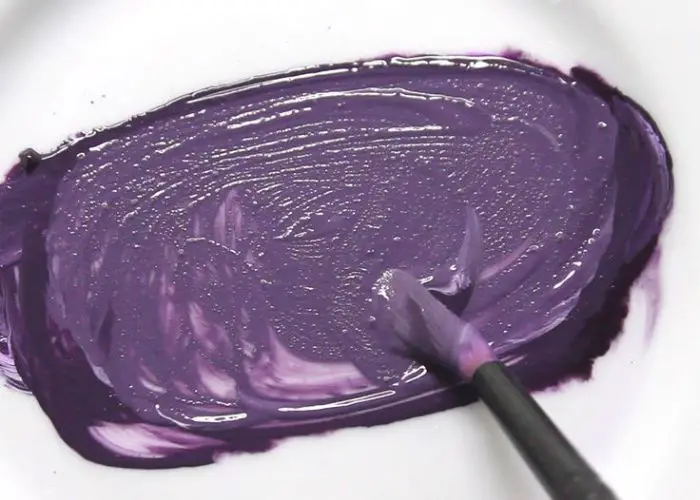
Acrylic Paint Tie Dye Ratio
When working with acrylic paint, it is important to understand the ratio of paint to water.
This will ensure that your paint is the correct consistency and will allow you to achieve the desired results.
To achieve a watercolor effect, use a ratio of 2 parts paint to 1 part water. For a more opaque look, use a ratio of 1 part paint to 1 part water.
And for a more metallic look, use a ratio of 1 part paint to 2 parts water. Keep in mind that these ratios are just a guide.
You may need to adjust the amount of paint or water depending on the brand of paint you are using and the desired effect you are trying to achieve.
How to Tie Dye with Acrylic Paint
Tie-dye is a fun and easy way to add some color to your wardrobe. You can use any color of acrylic paint to make tie-dye, and the results can be very striking.
Tie-dye is also a great way to upcycle old clothes that you might otherwise throw away.
Here’s a quick and easy guide on how to tie-dye with acrylic paint.
Materials and tools
- White shirt or piece of fabric
- Acrylic paint
- Water
- Sponge
- Cardboard/paper towels
How to make tie dye with acrylic paint (step by step)
Step one: Choose a light-colored fabric
The first thing to do is to choose a light-colored fabric. This could be an old white shirt, or you could use a piece of fabric from the craft store.
White color works best because it will allow the colors of the paint to really stand out.
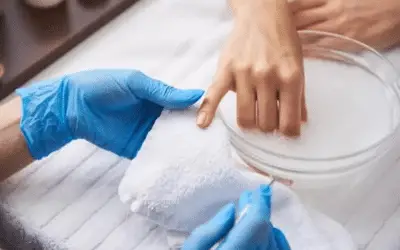
Step two: Pre-wash your fabric in a mild detergent
This step is important because it will remove any oils or impurities from the fabric. This will help the paint adhere better and prevent the colors from bleeding.
If the fabric has some paint, here is how to wash off fabric paint.
Step three: Prepare your work surface
Cover your work surface with cardboard or a plastic tablecloth. This will protect your surfaces in case of any spills.
Step four: Mix your acrylic paint with water
Next, mix your acrylic paint with water. The ratio of paint to water will depend on the desired effect you are trying to achieve.
For a more subtle look, use a ratio of two parts paints to one part water. For a more opaque look, use a ratio of one part paint to one part water.
Step five: Dip your fabric in the dye mixture, making sure to saturate it completely
Once you have mixed your paint and water, it’s time to apply the paint to the fabric. You can do this with a sponge or brush. Be sure to saturate the fabric evenly with the paint mixture.
Note: If you are using a brush, avoid making brush strokes. This will create lines in the final product.
Step six: Remove the excess dye
After you have saturated your fabric, remove any excess dye by wringing it out or blotting it with a paper towel.
Step seven: Wrap your fabric tightly in plastic wrap or with rubber bands
Now it’s time to let the dye work its magic. Wrap your fabric tightly in plastic wrap or with a rubber band. This will help the dye to set better and will prevent it from bleeding.
Step eight: Let your fabric sit for at least 24 hours
Let your fabric sit for at least 24 hours before unwrapping it. This will allow the dye to set completely.
Step nine: Unwrap your fabric and wash it in cold water (remove rubber bands)
After 24 hours have passed, you can now unwrap your fabric. Rinse it in cold water to remove any excess dye.
Step ten: Hang your fabric to dry in a well-ventilated area
Finally, hang your fabric to dry in a well-ventilated area. Once it is dry, you can enjoy your new tie-dyed shirt or piece of fabric!
Learn more: Is acrylic paint good for fabric?
Tie Dye Painting Ideas
Now that you know how to tie-dye with acrylic paint, here are some fun ideas to try out.
Tie dye painting on canvas
Tie dye painting on canvas is a beautiful and unique way to add color to your home decor. The process is simple and only requires a few supplies.
- First, choose the colors you want to use. Tie-dye kits typically come with six or more colors, so you can mix and match to create your own custom palette.
- Next, prepare your workspace by covering it with plastic or old newspapers. This will help keep your Tie-dye project contained and prevent accidental stains.
- Once you have your colors chosen and your workspace ready, it’s time to start painting!
- Tie-dye paint is applied in a similar fashion to regular acrylic paint, but the results are much more vibrant and eye-catching.
- Next, apply the paint to your canvas in whatever design you desire, allowing it to dry completely. The final step is to enjoy your beautiful new work of art!
Tie dye painting on paper
Tie dye painting on paper is a fun and easy way to add some color to your life!
The process is similar to painting on canvas, but there are a few things you’ll need to keep in mind.
- First, choose your colors carefully. You’ll want to use light-colored papers such as white, cream, or pastel shades. This will help to ensure that the final product is bright and vibrant.
- Next, cover your work surface with plastic or old newspapers. This will prevent any accidental stains.
- Once you have your colors chosen and your workspace ready, it’s time to start painting!
- Apply the paint to your paper in whatever design you desire, then let it dry completely.
Tie dye painting on wood
- To get started, you’ll need some Tie Dye Paint, a brush, and some wood that you want to paint.
- Once you have your supplies, simply apply the Tie Dye Paint to the wood using the brush.
- You can use any design you like, but Tie Dye Painting is traditionally done in a spiral pattern.
- Once you’re finished painting, allow the wood to dry completely.
How to Dye Fabric with Acrylic Paint without Medium
Tie-dying fabric with acrylic paint is a great way to add color to your home décor or to create unique garments.
But did you know that you don’t need a medium to do it? That’s right – you can dye fabric with acrylic paint without using any kind of medium at all.
Step one: Choose your fabric
The first step is to choose the fabric you want to dye. Natural fabrics such as cotton and linen work best, but you can also use synthetic fabrics such as polyester.
Remember that the final result may not be as vibrant on synthetic fabrics.
Step two: Choose your colors
Next, choose the colors you want to use. You can use any combination of colors you like, but it’s best to stick to three or four colors.
Step three: Prepare your workspace
Before you start painting, it’s important to prepare your workspace. Cover your work surface with plastic or old newspapers to prevent any accidental stains.
Step four: Paint your fabric
Once you have your workspace ready, it’s time to start painting! Apply the paint to the fabric in whatever design you desire.
Remember that you can also add glycerin mixture using a medicine dropper to make shades more vibrant or use a textile medium to make it dry softer.
Learn more here on painting fabric with acrylic paint.
Step five: Allow the fabric to dry
After you’re finished painting, allow the fabric to dry completely. This can take anywhere from a few hours to a day, depending on the type of fabric you use. You can also try to heat set your fabric once it is dry.
Step six: Enjoy your new dyed fabric!
Once the fabric is dry, you can enjoy your new tie dyed t shirts or piece of fabric!
How to Tie Dye with Acrylic Paint and Alcohol
Have you ever wanted to know how to tie dye with acrylic paint and alcohol? It’s actually not as difficult as you might think.
First, you’ll need to gather your supplies. You’ll need a white t-shirt, a container of acrylic paint, a bottle of rubbing alcohol, and a pair of rubber gloves.
Once you have your supplies, mix two parts alcohol to one part paint in the container. Next, soak the shirt in the mixture for about five minutes.
After the shirt has soaked, wring it out and begin tying it into knots. Be sure to leave some of the fabric loose so that the paint can seep through.
Once you’ve tied all the knots, put on the rubber gloves and paint over the fabric with the remaining paint mixture. Be sure to cover all of the knots completely.
Finally, allow the shirt to dry completely before untying the knots and wearing your new tie-dyed shirt.
Read also: What is chalk acrylic paint?
How to Tie Dye with Acrylic Paint and Salt
Tie-dyeing with paint and salt is a relatively simple process, and the results are stunning. You can use any color of acrylic paint to create a variety of different effects.
And the best part is that you don’t need special dyes or chemicals – just some paint, salt, and a little creativity.
You’ll need a white t-shirt, a container of acrylic paint, and some salt to get started.
First, mix the paint and salt together in the container until you have a thick paste.
Next, brush or sponge and apply the paint mixture to the t-shirt. Be sure to cover the entire surface evenly.
Once you’ve applied the paint, sprinkle salt over the wet areas. The salt will help to set the dye and create interesting patterns.
Let the shirt dry for at least 24 hours before washing it. But is acrylic paint washable on clothes? The answer is yes. When you’re ready to wash it, use cold water and a mild detergent. You may need to wash it a few times to get all of the salt out.
FAQs
How do you tie-dye at home with acrylic paint?
You don’t need any special supplies besides acrylic paints, spray bottles, or a white cotton shirt. But, here’s how to do it:
Start by mixing your paint with a little bit of water in the spray bottle. You want the consistency to be like milk, so it will soak into the fabric.
Next, squirt the paint onto your shirt in different patterns. Be sure to cover all of the white areas. Here, you can use the spiral technique.
Once you’re happy with your design, let the paint dry for about 30 minutes.
After the paint is dry, tie your shirt in a knot to secure the fabric. This will help the dye set better.
Then, rinse your shirt in cold water until the water runs clear.
Finally, untie your shirt and enjoy your new masterpiece!
What is the best fabric to use for tie-dyeing process?
Cotton is the best fabric to use for tie-dyeing because it absorbs color well. However, you can also use linen or hemp. Avoid using synthetic fabrics like polyester or nylon, as they won’t absorb the dye properly.
Can I use acrylic paint as dye?
Yes, you can use acrylic paint as dye. In fact, it’s one of the easiest and most affordable ways to tie-dye at home!
How do you dilute acrylic paint for tye dye?
Mix two parts of water with one part of paint to dilute acrylic paint for tie-dye. This will create a thinner consistency that will soak into the fabric better.
Conclusion
Tie-dyeing with acrylic paint is a fun and easy way to add some color to your life.
You can transform a plain white shirt into a work of art with just a few supplies.
So grab some paint and get creative! And if you have any questions, be sure to check out the FAQs section above.
Happy tie-dyeing!


Leave a Reply