Do you have a canvas, board, or other painting surface lying around the house and don’t know what to do with it? Gesso can help turn that blank canvas into something exciting.
Gesso is an incredibly versatile material, allowing amateur and professional artists alike to create stunning pieces of artwork.
You can use gesso as a base for all your art projects, from creating textured surfaces to priming canvases for painting.
Let us explore some cool things to do with Gesso in this blog post.
What Is Gesso?
Gesso is an acrylic primer used in painting to prepare surfaces like canvas, wood, or paper for acrylic, oil, or other types of paints.
It is made from a mixture of gypsum or chalk and a binder, often a type of glue, like rabbit skin glue or acrylic polymer. Many artists refer to the word gesso as “chalk” or “plaster” in Italian.
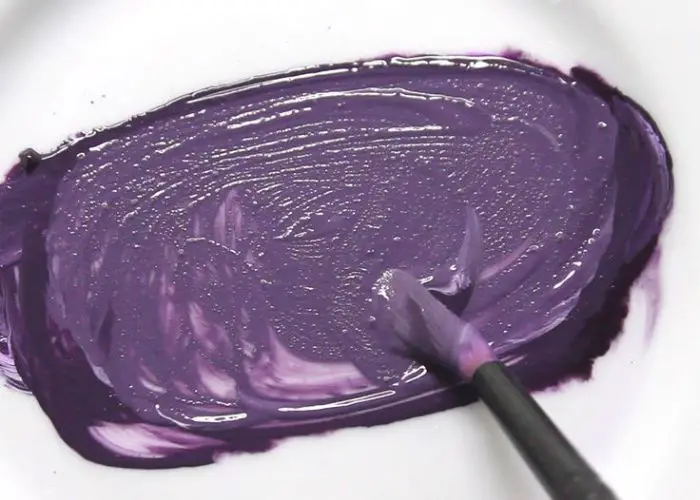
Gesso is applied to a surface to create a smooth, even, absorbent surface that helps the paint adhere and prevents it from soaking into the support.
Notably, it can be tinted to create colored ground or used to fix mistakes and create texture in paintings.
Cool Things To Do With Gesso
- Texture Building
- Stenciling
- Photo Transfer
- Mixed Media
- Gesso Resist
- Stamps
- Gesso Wash
- Draw Over
- Collage Base
- Gesso Carving
- Layering Colors
- Crackle Effect
- Monoprinting
Uses for Gesso
Some of the most common uses of gesso include:
1. Texture Building
Process: Apply gesso in successive layers using various tools—brushes, palette knives, sponges—to create unique textures. Each application should be dried before adding another for distinct texture layers.
End Result: A canvas with multi-dimensional tactile surfaces, ranging from subtle undulations to prominent raised effects.
Examples: Crafted landscapes where the texture mimics the roughness of terrains or abstract pieces where texture adds depth.
Benefits: Enhances artwork visually and tangibly, providing depth and a unique touch sensation.
Pitfall: Over-applying can yield an excessively rough surface, which might be problematic for detailed work or certain paint types
2. Stenciling
Process: Secure your chosen stencil onto your working surface. Gently apply gesso over the stencil ensuring an even spread. Once covered, remove the stencil cautiously to avoid smudging.
End Result: Sharp and precise patterns or designs on the surface, standing out distinctly from the base.
Examples: Background patterns on mixed media projects or standalone stenciled wall arts.
Benefits: Achieves detailed, professional-looking designs without needing freehand expertise.
Pitfall: Using too much gesso or moving the stencil can lead to bleeding or blurred designs.
3. Photo Transfer
Process: Brush gesso on your canvas evenly. Place a laser-printed photocopy image face down onto the wet gesso. After drying, wet the paper slightly and rub gently to reveal the transferred image.
End Result: A clear, semi-vintage image transfer integrated seamlessly onto the canvas.
Examples: Incorporating old family photos into a larger artwork or creating vintage-style posters.
Benefits: Personalizes artworks with specific images, adding a unique and custom touch.
Pitfall: If not done correctly, some image details might get lost or appear patchy.
4. Mixed Media
Process: Integrate gesso with materials like sand, lace, or fabric scraps, and spread this mixture on your canvas or paper.
End Result: A varied, tactile surface imbued with unique elements that create depth and character.
Examples: Beach-themed artworks using real sand or collage pieces integrating fabric elements.
Benefits: Allows for a rich multi-textured experience and a visually arresting end product.
Pitfall: Some materials might not adhere well and may peel off if not sufficiently embedded.
5. Gesso Resist
Process: Paint patterns or designs with gesso onto your chosen surface. Once dry, brush over with watercolor or ink.
End Result: A captivating interplay between gesso and color, where the gesso patterns resist the paint.
Examples: Floral designs with vibrant watercolor backgrounds highlighting the gessoed areas.
Benefits: Creates a unique contrast between gesso and paint, adding depth to artwork.
Pitfall: Incomplete drying may cause undesired blending of gesso and paint.
6. Stamps
Process: Dip stamps in gesso and firmly press them onto the surface, ensuring an even imprint.
End Result: Raised or embossed designs on the surface, providing both visual and tactile appeal.
Examples: Textured backgrounds for scrapbooking or as a base for painting.
Benefits: Quickly achieves consistent and unique patterns without freehand drawing.
Pitfall: Gesso might accumulate in stamp details; immediate cleaning is essential.
7. Gesso Wash
Process: Dilute gesso with water and apply it as a wash over existing drawings or sketches, ensuring even coverage.
End Result: A softened, slightly obscured rendition of the original artwork, lending a faded or vintage feel.
Examples: Giving sketches a background wash for a dreamy or antique look.
Benefits: Offers a unified and artistically aged appearance.
Pitfall: If overly diluted or unevenly applied, the wash might not yield the desired effect.
8. Draw Over
Process: Apply a gesso layer on your surface and, after drying, use your favorite drawing mediums to sketch or design over it.
End Result: Enhanced textures that give sketches a novel and interesting ground.
Examples: Portraits where gesso texture brings out unique shadow effects or abstract designs.
Benefits: Creates an ideal, slightly grainy surface that grabs onto drawing mediums.
Pitfall: Finer drawing details may be challenging if the gesso texture is too rough.
9. Collage Base
Process: Use gesso as a base and adhesive by spreading it on your canvas, then pressing paper, fabric, or other materials onto it while still wet.
End Result: A unified artwork where diverse materials are seamlessly integrated into the canvas.
Examples: Memory collages featuring photos, ticket stubs, and letters or an art piece combining paint and newspaper clippings.
Benefits: Gesso acts as both a unifying base coat and an adhesive, ensuring a cohesive appearance.
Pitfall: Too much gesso might cause some materials, especially thin papers, to warp or bubble.
10. Gesso Carving
Process: Apply a thick layer of gesso on your surface. While it’s still wet, use carving tools to etch designs into it.
End Result: A relief-style artwork with designs that are both visual and tactile.
Examples: Creating text-based artworks with raised letters or reliefs of simple shapes and patterns.
Benefits: The carved design provides a 3D effect, adding a sculptural dimension to the artwork.
Pitfall: Over-carving might weaken the gesso layer or cause it to chip when dried.
11. Layering Colors
Process: Mix gesso with different acrylic paints and apply in distinct layers, allowing each to dry before the next.
End Result: A richly textured artwork with depth and varied color tones.
Examples: Abstract paintings that rely on color interplay and depth.
Benefits: Enables the creation of custom-colored, textured backgrounds or layers.
Pitfall: If layers aren’t allowed to dry, colors might blend unintentionally, muddying the final appearance.
12. Crackle Effect
Process: Spread a liberal amount of gesso and use a high-heat hair dryer or heat gun over the surface while it’s still wet.
End Result: A canvas with a vintage, cracked appearance similar to aged paint or plaster.
Examples: Artworks aiming for an antique, weathered aesthetic.
Benefits: Introduces a vintage, rustic charm to any artwork.
Pitfall: The crackle effect can be unpredictable; excessive heat or gesso might lead to larger, undesired cracks.
13. Monoprinting
Process: Spread gesso on a non-porous surface like glass, etch a design, then press paper onto it to transfer the image.
End Result: A singular print that can’t be perfectly replicated, giving it an exclusive feel.
Examples: Creating limited-edition prints for sale or display.
Benefits: Offers a unique printmaking technique that doesn’t require specialized equipment.
Pitfall: Gesso might adhere too strongly to the non-porous surface if not removed promptly, complicating subsequent prints.
14. Sgraffito Technique
Process: Apply a colored base layer (e.g., with acrylics) on your canvas. Once dry, overlay it with a thick layer of gesso. While the gesso is still wet, use a tool to scratch and reveal the color beneath.
End Result: An intriguing artwork showcasing the underlying color through carved designs.
Examples: Geometric patterns or revealing portions of a portrait underneath.
Benefits: Creates dynamic visual interest with the contrast of revealed colors.
Pitfall: Waiting too long can harden the gesso, making it difficult to scratch designs.
15. Metallic Mix
Process: Blend gesso with metallic powders or paints. Apply this mixture over your desired surface.
End Result: A shimmering, metallic-finished surface ready for further embellishment.
Examples: Backgrounds for cosmic paintings or fantasy-themed artworks.
Benefits: Adds a luxurious, shimmering finish to the artwork.
Pitfall: Overmixing can dilute the metallic effect; a test patch is recommended.
16. Impasto Technique
Process: Combine gesso with a gel medium to thicken it. Apply this thick mixture using a palette knife, creating peaks and valleys.
End Result: A heavily textured surface reminiscent of impasto painting but in white.
Examples: Highlighting portions of a landscape, like snowy mountains or frothy ocean waves.
Benefits: Gives volume and tangible depth to the canvas, enhancing the 3D effect.
Pitfall: If the mixture is too thick, it may crack when drying.
17. Ghost Imaging
Process: Apply a layer of gesso onto a canvas. While it’s still wet, press leaves, lace, or other textured materials onto the surface. Remove the items once the gesso dries.
End Result: Delicate imprints or “ghost images” of the textured materials used.
Examples: Creating natural patterns with leaves or a vintage look with lace.
Benefits: Easy technique for achieving intricate patterns without manual detailing.
Pitfall: Some materials may stick if left too long or if gesso is too thick.
18. Gesso Drips
Process: Dilute gesso to a runny consistency. Using a brush, drip or splatter gesso onto your canvas, allowing it to run and create natural patterns.
End Result: Random drip patterns and splatters that can be incorporated into abstract or contemporary art.
Examples: Creating backgrounds for urban or grunge-themed pieces.
Benefits: Introduces spontaneity and randomness, giving artworks a free-flowing feel.
Pitfall: Can be messy, and patterns may be unpredictable.
19. Gradient Effect
Process: Start with a canvas painted in a color gradient. Apply a semi-transparent layer of gesso, heavier on one end and lighter on the other, blending the transition.
End Result: A gradient surface transitioning from colored to white.
Examples: Representing dawn or twilight in landscape paintings.
Benefits: Allows for subtle transitions between raw canvas and colored sections.
Pitfall: Uneven blending can create harsh transitions.
Key Ingredients Used�? in Gesso
Gesso contains ingredients that create the stiff, white coating used for painting surfaces. The main ingredients typically found in gesso are:
i. Titanium Dioxide
Titanium dioxide is a white pigment that provides opacity and whiteness to the gesso. Paints commonly use it as an extender, filler, and brightener. It can also be used as an additive to improve paint film durability.�?
ii. Calcium Carbonate
Calcium carbonate is a natural material that acts as a binder and filler in gesso. It helps to bind all the other ingredients together and provides a smooth, white surface for painting on.�?
The presence of calcium carbonate also enhances the durability of the paint film.
iii. Acrylic Polymer in Water
Acrylic polymer is used as an adhesive in gesso. It helps to bind the other ingredients together and provides a water-resistant coating, which makes it ideal for use on walls or ceilings that may be exposed to moisture.
The acrylic polymer also improves the durability of the paint film and makes it more resistant to scratches and abrasion.
Types Of Gesso
The three main types of Gesso include the following:
White Gesso
White gesso is a primer specially formulated for use on canvas or other absorbent surfaces. It provides a smooth, consistent surface that is perfect for painting on.
The white colour allows artists to see the true colours of their paint, making it easier to create accurate artwork.
When using white gesso, you don’t have to worry about the background colour of the canvas affecting the look of your painting.
Black Gesso
Black gesso is specifically designed for use on dark surfaces. It provides a black base that blocks out any existing colours beneath it, allowing your artwork to be seen clearly.
Black gesso is perfect for creating a dark mood in your artwork and adding texture or dimension to the surface of your canvas.
Transparent Gesso
Transparent or clear gesso is used on both light and dark surfaces. It provides an invisible layer of protection between the canvas or other material and the paint, allowing for greater control over the look of your artwork.
It lets you create a glossy finish on your painting or drawing. Clear gesso also helps prevent cracking and fading of your artwork over time.
Here’s more on canvas painting protectors.
How To Apply Gesso
Materials: Gesso, a flat brush, canvas, palette knife (optional), water.
- Setup: Protect work area with newspapers. Work in a well-ventilated space.
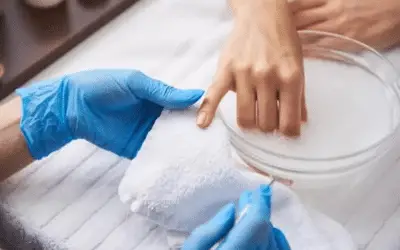
- Preparation: Clean canvas to remove dust or oils.
- Gesso Prep: Stir gesso to a smooth consistency. Dilute with water if too thick.
- Application: Load brush without dripping. Apply gesso in parallel strokes from top to bottom. Allow the gesso to dry.
- Second Coat: Apply perpendicularly to the first layer for cross-hatching.
- Additional Layers: Depending on canvas absorbency and desired texture, add more coats, allowing each to dry.
- Optional Sanding: For extra smoothness, lightly sand the dried gessoed surface.
- Cleanup: Rinse brushes/tools with water. Store leftover gesso properly.
- Curing: Wait 24 hours post-application before painting to ensure best adhesion
Interesting Read: What to Paint on a Black Canvas?
Interesting Read: Can You Sublimate Acrylic?
FAQs
Can I use white acrylic paint instead of gesso?
While you can use white paint as a substitute, it is not recommended. Gesso has a different composition and texture compared to regular acrylic paints, meaning that the results may be unsatisfactory. Unlike gesso, white paint cannot provide an even and consistent surface.
Can I use gesso as glue?
No, it is not recommended that you use gesso as glue. Gesso is not a suitable adhesive and will not provide the desired results. Instead, you should use an appropriate glue or adhesive for this purpose. Plus, gesso can leave a residue on the surface of your material, which may be difficult to remove.
Can you mix black and white gesso?
Yes, you can mix black and white gesso to create different shades of gray. By combining black and white gesso, you can adjust the ratio of the two colors to achieve shades of gray, ranging from light gray to dark gray. This gives you more control over your artwork’s tonal values.
Can you make Gesso at home?
Yes, you can make Gesso at home by mixing one part white glue with two parts water, then adding two to three parts of white talcum powder or baking soda. Stir until the mixture has a smooth and consistent texture. Use your homemade gesso with baking soda to prime surfaces for painting, providing a smooth and stable base.
Conclusion on Cool Things To Do With Gesso
Gesso is a great product for creating unique, customized looks. Whether you want to freshen up an old piece of furniture or create a textured and unique painting for your home, gesso is the right choice.
From traditional techniques such as antiquing and stenciling to more modern techniques like dry brushing and layering, there is so much that can be done with gesso.
Get creative and explore the different possibilities; you might find something you love. Why not spend some time exploring cool things to do with Gesso?
There are no limits to the amazing work you can create. Take the plunge and have some fun with gesso today.


Leave a Reply