Are you tired of dull and lackluster acrylic paintings? A glossy finish can make colors pop, bring out the details of the painting, and add a professional-looking touch.
But how can you achieve a glossy finish with acrylic paint? In this article, we will explore how to make acrylic paint look glossy.
From selecting the right materials to applying the gloss finish, we’ll provide you with step-by-step instructions to transform your acrylic paintings into stunning works of art.
Get ready to discover the techniques that will make your paintings shine with a beautiful and glossy finish.
How Can I Make My Acrylic Painting Glossy?
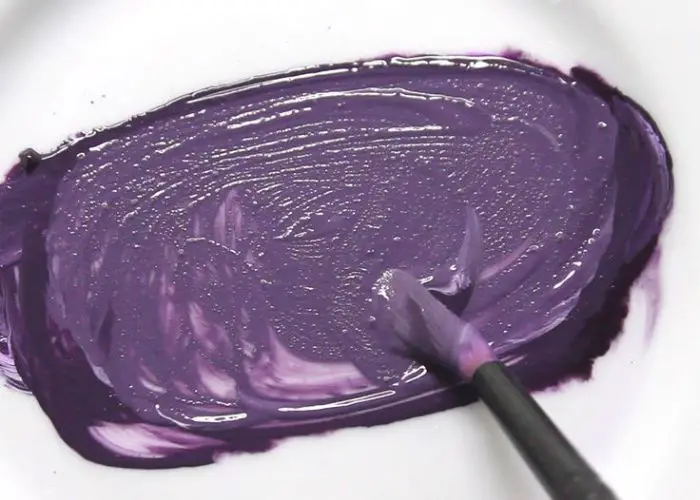
To make your acrylic painting glossy, you can utilize a gloss medium. Simply mix the gloss medium with your acrylic paints to enhance their natural luster. Apply the mixture to your painting using brush strokes or other desired techniques. Once dry, your acrylic painting will have a glossy and captivating finish.
Gloss Mediums and Gloss Varnishes for Achieving a Glossy Finish
Acrylic gloss mediums and varnishes are specially formulated to add a glossy finish to acrylic paintings. They are available in different types of finishes, including high gloss, semi-gloss, and satin.
Gloss mediums are additives that are mixed with acrylic paint to increase its glossiness and translucency. They can also improve the adhesion and durability of the paint.
Gloss mediums are typically applied directly to the painting surface before the paint is applied. They can be mixed with the paint or applied as a separate layer over the painted surface.
Varnishes, on the other hand, are applied as a final layer over the painted surface to protect the paint from damage and to add a glossy finish.
They are available in different types of finishes and can be either permanent or removable.
When choosing a gloss medium or varnish, it’s important to consider the desired finish and application method.
Some gloss mediums and varnishes can be applied with a brush, while others can be sprayed or poured onto the surface.
It’s also important to choose a product that is compatible with the type of paint and surface you are working with.
Interesting read: Flat vs satin paint.
The Best Glossy Acrylic Mediums for Achieving a Glossy Finish
To achieve a glossy finish on your acrylic paintings, selecting the right glossy medium is crucial. Here are three highly recommended glossy acrylic mediums:
1. Winsor & Newton Galeria Acrylic Gloss Medium
- High clarity and even flow
- Boosts the brilliance and transparency of color, as well as improving adhesion and durability
- Ideal for glazing or applying think, highly transparent layers of brilliant color for depth and stained glass effects
Winsor & Newton is a trusted brand in the art world, and their Galeria Acrylic Gloss Medium is no exception.
This medium is known for its high-quality formulation and ability to enhance color vibrancy and provide a glossy sheen to acrylic paintings.
It can be mixed with acrylic paint or applied as a topcoat for a professional-looking finish. The Acrylic Gloss Medium is easy to use and dries to a durable, water-resistant finish.
It is a must-have for any artist looking to add a glossy finish to their acrylic paintings.
Pros
- Enhances color vibrancy and provides a glossy sheen to acrylic paintings.
- Can be mixed with acrylic paint or used as a topcoat.
- Easy to use and water-resistant finish.
- Trusted brand with a reputation for high-quality art supplies.
Cons
- May require multiple layers to achieve a high-gloss finish.
- Some artists find the consistency to be slightly thick, requiring thinning it with water for certain applications.
2. Liquitex Professional Acrylic Gloss Medium
- Thick, creamy with satin finish; Good pigment load
- Retains peaks and brush strokes; Ideal for learning color theory and color mixing
- Includes 250ml tube of acrylic paint
Liquitex is a renowned brand in the art world, and their Professional Acrylic Gloss Medium is a top-of-the-line product for achieving a glossy finish on acrylic paintings.
This professional-grade medium is known for its clarity and versatility. It enhances the depth of colors and produces a long-lasting glossy finish that is resistant to cracking and yellowing.
It can be used as a medium or applied as a final varnish to protect the paint from damage.
This Acrylic Medium is an excellent choice for artists who want to achieve a high-quality, professional-looking finish.
Pros
- Provides a clear, high-gloss finish that enhances color depth.
- Versatile, can be used as a medium or applied as a final varnish.
- Offers excellent durability and resistance to cracking and yellowing.
- Trusted brand with a wide range of compatible art materials.
Cons
- Slightly more expensive compared to other options on the market.
- May require proper ventilation due to the presence of chemicals.
3. Pebeo Studio Acrylics Pouring Medium
- PROTECT AND PRESERVE YOUR MASTERPIECE: Pébéo Studio Acrylics Transparent Pouring Medium is a clear, protective coating that delivers a stunning high gloss shine while preserving your work
- NON-YELLOWING FORMULA THAT WON’T CHIP OR CRACK: Pébéo Studio Acrylics Transparent Pouring Medium dries to a translucent, high gloss finish that creates a flexible film over your work to preserve the vibrancy and color
- NO MIXING NECESSARY: Our ready-to-use acrylic paints are pre-mixed so that they flow smoothly, making them great for creating a variety of effects
For artists interested in achieving a glossy poured acrylic effect, the Pebeo Studio Acrylic Pouring Medium is an excellent choice.
This medium creates smooth, glossy surfaces with brilliant colors and excellent transparency.
It can be used with regular acrylic paints, inks, and other media to create unique effects and textures.
The Pouring Medium is easy to use and dries to a glossy finish that is resistant to cracking and fading.
It is a great choice for artists who want to experiment with new techniques and create stunning poured acrylic paintings with a glossy finish.
Pros
- Specifically designed for achieving glossy poured acrylic effects.
- Creates smooth surfaces with brilliant colors and excellent transparency.
- Can be used with various acrylic paints, inks, and media.
- Easy to use and dries to a glossy, crack-resistant finish.
Cons
- Primarily intended for pouring techniques, limiting its versatility for other applications.
- Requires proper handling and care to avoid potential air bubbles during pouring.
Note: Avoid hardware store epoxy resins. The composition and properties of these resins may not be compatible with the pouring medium, leading to undesirable results. Stick to using the recommended pouring mediums or resin products specifically designed for acrylic pouring, or any other recommended floetrol substitute to ensure the best outcome for your glossy finish.
Choosing the Right Materials
To achieve a glossy finish with acrylic paint, it’s crucial to select the right materials and tools for the process.
This involves considering the appropriate surfaces that work well with glossy acrylic paint and gathering the necessary tools and supplies.
Surfaces
Different types of surfaces can work well with glossy acrylic paint. Examples include canvas, wood panels, or acrylic-specific papers.
Choose a surface that is smooth and properly primed to ensure an even application of the gloss medium or acrylic varnish.
Consider the size and shape of the surface based on your painting requirements.
Tools and Materials
To prepare and apply the glossy finish, you will need the following materials and tools:
- High-quality brushes suitable for acrylic paint application.
- Fine-grit sandpaper or sanding blocks.
- A clean workspace free from dust and debris.
- A gloss medium or high gloss varnish suitable for acrylic paint.
- A container for mixing the gloss medium or varnish.
- A palette knife or stir stick for mixing the gloss medium or varnish.
Preparing the Painting Surface
Properly preparing the painting surface is crucial to achieve a glossy finish with acrylic paint.
This involves understanding the importance of surface preparation and following specific steps to ensure an optimal outcome.
Importance of Surface Preparation
Explain why surface preparation is important for a glossy finish. Emphasize that a well-prepared surface provides a smooth and even foundation for the gloss medium or glossy varnish, resulting in a more professional-looking outcome.
Discuss how proper preparation helps prevent imperfections and enhances the adhesion of the glossy layer.
Steps for Preparing the Painting Surface
Provide an overview of the different steps involved in preparing the painting surface, including:
- Cleaning: Instruct the importance of starting with a clean surface. Remove any dust, dirt, or debris using a soft cloth or mild cleaning solution, ensuring that the surface is completely dry before proceeding.
- Sanding: Explain that sanding helps create a smooth surface by removing imperfections or rough areas. Use fine-grit sandpaper or sanding blocks to gently sand the surface, ensuring an even texture.
- Priming: Discuss the significance of priming the surface, particularly for porous surfaces like canvas or wood. Apply a suitable primer using a brush or roller, following the manufacturer’s instructions, and allow it to dry completely.
Tips for Achieving an Even Surface
Offer tips for achieving an even surface to ensure a glossy finish:
- Use light, even pressure when sanding to avoid creating uneven textures or gouges.
- Remove any excess dust or debris after sanding to ensure a clean surface for the glossy layer.
- Apply multiple thin coats of primer if necessary, allowing each coat to dry completely before applying the next.
How to Make Acrylic Paint Look Glossy
Achieving a glossy finish on acrylic paint involves a step-by-step process that ensures optimal results.
Follow these 7 steps to make your acrylic paint look glossy:
Step 1: Prepare the painting surface
Before applying the glossy finish, it’s essential to prepare the surface for optimal results.
- Start by thoroughly cleaning the surface to remove any dirt, dust, or other contaminants.
- Next, gently sand the surface using fine-grit sandpaper or sanding blocks. This helps create a smooth texture by removing any imperfections or rough areas.
- Finally, apply a suitable primer to enhance adhesion and create an even base for the glossy finish.
Step 2: Select the appropriate gloss medium or varnish
Choosing the right gloss medium or varnish is crucial for achieving the desired glossy effect.
Consider the type of finish you want, such as high gloss, semi-gloss, or satin, and the application method you prefer, such as brushing, spraying, or pouring.
Take into account the compatibility of the product with acrylic paint and the surface you are working on.
Some recommended options include Winsor & Newton Galeria, Liquitex Professional, and Pebeo Studio Acrylics.
Step 3: Thoroughly mix the gloss medium or varnish
Before applying the gloss medium or varnish, make sure to thoroughly mix it. This ensures an even distribution of the glossy properties throughout the product.
Use a palette knife or stir stick to mix the medium or varnish until it is well blended. Properly mixing the product will contribute to a consistent and smooth glossy finish on your acrylic painting.
For a detailed understanding, you can check our post on how to paint smoothly with acrylics.
Step 4: Apply the first coat of gloss medium or varnish
Using a brush or tool of your choice, apply a thin and even coat of the gloss medium or varnish to the painting surface.
Work in one direction to minimize the appearance of brush strokes or texture inconsistencies.
Applying a thin coat allows for better control and helps prevent issues such as drips or pooling of the medium or varnish.
Related Read: Painting Over Acrylic Paint
Step 5: Allow the first coat to dry completely
After applying the first coat, allow it to dry completely before proceeding to the next step.
Follow the manufacturer’s instructions regarding drying time, as it may vary depending on the specific product used.
Ensuring that the first coat is fully dry allows for proper adhesion of subsequent layers and prevents any smudging or damage to the finish.
Step 6: Apply additional coats as needed
If a more pronounced glossy effect is desired, apply additional coats of the gloss medium or varnish.
Apply each coat in thin layers, allowing each coat to dry fully before applying the next one.
This acrylic paint layering technique builds up the glossiness gradually, resulting in a smoother and more professional-looking glossy finish.
Remember to maintain consistency in the application direction to achieve a uniform appearance.
Step 7: Allow the final coat to dry and cure
After applying the desired number of coats, allow the final coat to dry and cure according to the manufacturer’s instructions.
Proper drying and curing time is essential for achieving optimal durability and longevity of the glossy finish.
Avoid touching or moving the painting during this stage to prevent any unwanted marks or blemishes.
Once fully dried and cured, your acrylic painting will showcase a beautiful and glossy finish.
Different Application Techniques
- Brushing Technique: Precise control with a brush. Apply gloss medium or varnish, and consider incorporating glass bead gel for added texture.
- Spraying Technique: Smooth and even coverage. Apply a thin layer as a base with a spray varnish or gloss medium, then selectively add glass bead gel for texture.
- Pouring Technique: Create three-dimensional effects. Mix glass bead gel with paint and pouring medium, pour onto the surface, and let the glass beads create captivating patterns.
- Glass Bead Gel Technique: Pronounced textures and glossy finish. Apply glass bead gel with a brush or palette knife to create raised designs and multidimensional effects.
Drying and Curing: Essential Steps for a Glossy Finish
Proper drying and curing are crucial steps in achieving a flawless and glossy finish on acrylic paint.
Here’s what you need to know about the importance of these processes, recommended drying times, curing methods, and ensuring proper ventilation for optimal results.
Importance of Drying and Curing
Proper drying eliminates excess moisture from the gloss medium or varnish, allowing subsequent coats to adhere well.
Curing ensures the gloss medium or varnish hardens to provide durability and enhance the glossy appearance.
Recommended Drying Time
Drying times can vary depending on factors such as the type of gloss medium or varnish, environmental conditions, and application thickness.
As a general guideline, allow each coat to dry for approximately 2-4 hours before applying additional coats. However, always refer to the manufacturer’s instructions for specific drying times.
Curing Methods
Can you bake acrylic paint? Find out.
Curing processes may differ based on the product and its specifications.
Air-drying typically takes around 24-48 hours, while heat-setting may require placing the artwork in an oven at a low temperature for a specific duration.
UV-curing involves exposing the artwork to ultraviolet light for a designated period. Follow the manufacturer’s guidelines for the recommended curing method and duration.
Tips for Proper Ventilation
During the drying and curing process, ensure proper ventilation to facilitate the release of fumes and promote even drying.
Work in a well-ventilated area or use fans and open windows to allow fresh air circulation. Avoid drying or curing in enclosed spaces with poor ventilation to prevent the accumulation of harmful fumes.
Maintaining a Glossy Finish: Preserving the Luster of Your Acrylic Paintings
Properly caring for and maintaining a glossy finish on acrylic paintings is essential to preserve their vibrant appearance over time.
Here are some tips and guidelines for maintaining the glossy finish and avoiding common issues like yellowing, cracking, and dust accumulation, as well as how to safely clean the artwork without causing damage.
Proper Care and Maintenance
- Handle the painting with clean hands and avoid touching the painted surface to prevent oils and dirt transfer.
- Display the artwork away from direct sunlight, as prolonged exposure can fade colors and potentially yellow the glossy finish.
- Avoid extreme temperatures and high humidity, as they can negatively impact the stability of the paint and gloss medium or varnish.
Avoiding Common Issues
- Use archival-quality materials for framing, matting, and storing the artwork to prevent potential chemical reactions that can lead to yellowing or deterioration.
- Keep the painting away from sources of pollutants, such as smoke or strong odors, as they can adhere to the glossy surface and affect its appearance.
- Regularly dust the painting using a soft, lint-free cloth or a soft brush designed for artwork, gently removing any surface dust or debris.
Safely Cleaning a Glossy Finish
- Use a soft, clean cloth or a brush specifically designed for artwork cleaning.
- If necessary, lightly dampen the cloth with water or use a mild, non-abrasive cleaning solution specifically formulated for delicate surfaces.
- Gently wipe the surface in a circular motion, being careful not to apply excessive pressure or scrub vigorously.
- Always test any cleaning solution on a small, inconspicuous area of the painting before applying it to the entire surface.
Handling Stubborn Stains
- For stubborn stains or marks, consult with a professional art conservator or restoration expert who can provide guidance on specialized cleaning techniques or products.
- Avoid using harsh chemicals, abrasive cleaners, or excessive moisture, as they can damage the glossy finish and underlying paint layers.
How to Make Acrylic Paint Look Glossy on Shrinky Dinks
Can you use paint on shrinky dinks? Absolutely! Acrylic paint is suitable for decorating Shrinky Dinks. To make it look glossy, follow these steps:
- Use acrylic paint to create your desired design on the Shrinky Dinks.
- After painting, let the paint dry completely.
- Apply a glossy acrylic varnish or sealant over the painted surface.
- Allow the varnish to dry according to the product instructions.
- The varnish will add a glossy finish to the acrylic paint, enhancing its appearance on the Shrinky Dinks.
FAQs
How can I make my acrylic painting glossy?
To make your acrylic painting glossy, you can use a gloss medium or varnish specifically designed for acrylic paints. Apply thin and even coats of the gloss medium or varnish to the surface of your dry painting, allowing each coat to dry fully before applying the next. Multiple layers will build up the glossy effect.
How do you make acrylic paint look like glass?
To create a glass-like effect with acrylic paint, you can use a glossy pouring medium or glass paint sealer with a glossy finish. Mix the pouring medium or resin with your acrylic paint, following the manufacturer’s instructions. Apply the mixture to your painting surface, and allow it to dry and self-level, creating a smooth and reflective surface that resembles glass.
How do you make matte acrylic paint shiny?
If you want to transform a matte acrylic paint into a shiny finish, you can apply a gloss medium or varnish over the painted surface. Once the matte paint is completely dry, brush or spray a thin and even layer of gloss medium or varnish onto the painting. Allow it to dry according to the manufacturer’s instructions.
(Here’s a detailed guide on how to make matte paint glossy).
How to make acrylic paint look wet?
To make acrylic paint look wet, you can use a glossy medium or varnish. Apply a thin and even layer of the glossy medium or varnish over the dry acrylic paint, using a brush or tool. The glossy medium or varnish will create a wet and reflective appearance, giving the impression of freshly applied paint.
Read also: How to make acrylic gesso paint.
Conclusion
Achieving a glossy finish on acrylic paint is a transformative process that enhances the vibrancy and visual impact of your artwork.
By following the step-by-step instructions, selecting the right materials, mastering application techniques, and understanding the importance of drying and curing, you can create a stunning glossy finish.
Remember to properly care for and maintain the glossy appearance, avoid common issues, and use gentle cleaning techniques.
With dedication and attention to detail, your acrylic paintings can radiate with a captivating and professional-looking glossy finish, elevating their overall beauty and allure.
Embrace the possibilities that a glossy finish offers and let your creativity shine.


Leave a Reply