Do you need to seal painted wood? What are the best acrylic paint sealers for wood? In this blog post, we will answer these questions and more.
We will discuss how to seal acrylic paint on wood with various types of sealants, including polyurethane, furniture wax, polyacrylic sealant, clear sealant for wood, varnish, glaze, and epoxy resin.
We will also provide tips for sealing painted wood and offer suggestions on the best acrylic paint sealers for your needs.
How to Seal Acrylic Paint on Wood
You can use a sealer, a primer, or a topcoat. Sealers provide the most protection against chipping and fading, while primers help to prevent staining and allow the paint to adhere better to the surface. Topcoats add a layer of protection and can also give the paint a glossy or matte finish.
Can you seal acrylic paint?
Yes, acrylic paint can be sealed effectively.
This process entails the application of a protective, often polymer-based layer, such as varnish or acrylic medium.
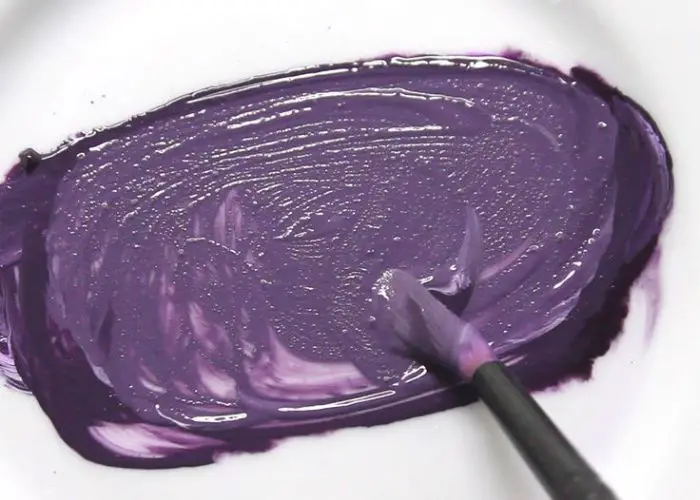
Acrylic paint is a blend of pigments suspended within an acrylic polymer emulsion, akin to a water-based plastic.
This sealing layer functions as a robust shield, guarding the paint against environmental factors and physical abrasion.
In essence, sealing acrylic paint operates on a chemical level, isolating pigment particles and augmenting both longevity and visual allure.
Do You Need to Seal Painted Wood?
Yes, you need to seal acrylic to protect and preserve artwork.
Sealing acrylic paint forms a clear protective layer that shields the paint from environmental factors, such as dust, moisture, and UV radiation.
This protective barrier helps maintain the paint’s vibrancy and durability over time.
Various sealers, including varnish and acrylic mediums, can be used to achieve this protective effect.
Get to know more: Can you use acrylic paint on wood?
How to seal acrylic paint on wood (for outdoor and indoor use)
Let’s walk you through each step in detail, explaining why each is important and what pitfalls to avoid.
Materials Needed
- Acrylic Paint: Choose high-quality acrylic paints in your desired colors.
- Wood Surface: Select a clean, sanded, and dry wood surface. Popular choices include plywood, MDF (Medium-Density Fiberboard), or solid wood.
- Paintbrushes: A variety of brushes, including flat, round, and detail brushes.
- Water: For thinning acrylic paint and cleaning brushes.
- Palette: A palette for mixing and blending your acrylic paints.
- Paper Towels or Cloth: To wipe brushes and surfaces as needed.
- Sealer: There are various sealers available for acrylic paint on wood, including acrylic varnish, polyurethane, and Mod Podge. Choose the one that suits your project.
- Foam Brush or Soft Bristle Brush: For applying the sealer.
- Sandpaper: Fine-grit sandpaper (around 220-400 grit) for smoothing the wood surface.
- Drop Cloth or Plastic Sheeting: To protect your workspace from spills.
Step 1: Prepare Your Workspace
Before diving into your acrylic painting project, it’s crucial to set up a clean and organized workspace.
Lay down a drop cloth or plastic sheet to protect your working surface from paint spills and splatters.
Having a well-organized workspace will help you stay focused and make the process smoother.
Step 2: Prepare the Wood Surface
A key to a successful acrylic painting on wood is starting with a smooth and properly prepared surface.
To achieve this, begin by sanding the wood surface. Sanding serves several important purposes.
First, it removes any rough spots, splinters, or imperfections on the wood, creating a smooth canvas for your paint. Second, it helps the acrylic paint adhere better to the surface.
Use fine-grit sandpaper, typically around 220-400 grit, to sand the wood. Always sand in the direction of the wood grain to avoid creating scratches or rough spots.
After sanding, wipe away any dust and debris using a clean, dry cloth. This ensures that your paint will adhere evenly to the surface.
Step 3: Choose Your Design and Paint
Once your wood surface is prepared, it’s time to start thinking about your design.
If you have a specific image or pattern in mind, you can lightly sketch it onto the wood surface using a pencil.
This step is optional but can be especially helpful for beginners who want to ensure accurate placement of their design elements.
Now, it’s time to start painting. Acrylic paint offers a wide range of vibrant colors and is known for its versatility.
Depending on your project, you can choose from a variety of brush types, including flat brushes for broad strokes, round brushes for detail work, and liner brushes for fine lines.
As you begin to apply the acrylic paint, consider the consistency of your paint. Acrylics can be thinned with water to achieve the desired thickness for your project.
Thicker paint is often used for impasto techniques or textured effects, while thinner paint works well for smoother, more translucent layers.
Step 4: Layer and Let Dry
Acrylic paint is known for its quick drying time, which allows artists to build up layers and add depth to their artwork.
After applying each layer of paint, it’s essential to let it dry completely before adding the next.
This step ensures that the colors do not mix and that your design maintains its clarity and vibrancy.
While drying times can vary depending on factors like humidity and the thickness of your paint layers, a good rule of thumb is to allow at least 15-30 minutes of drying time between layers.
For larger and thicker layers, or if you’re in a humid environment, you may need to wait longer.
Step 5: Apply Multiple Coats
Achieving a solid and even coverage of paint often requires multiple coats. Acrylic paint can be somewhat translucent, especially when applied thinly, so building up layers is essential for a bold and vibrant finish.
Be patient during this process and allow each coat to dry completely before applying the next.
Rushing this step can lead to uneven coverage, color blending, and longer overall drying times.
Step 6: Sanding Between Coats (Optional)
If you’re looking to achieve an ultra-smooth finish on your acrylic painting, you can consider sanding between coats.
This step is entirely optional and is typically done for projects where an exceptionally smooth and flawless surface is desired.
To sand between coats, use a fine-grit sandpaper (around 220-400 grit).
The key here is to be gentle and use a light touch to avoid removing too much paint or damaging your design.
After sanding, wipe away any dust with a clean, dry cloth before applying the next coat of paint.
Step 7: Select the Right acrylic paint sealer for wood
Choosing the appropriate acrylic varnish finish is the first step. You have options like glossy, matte, or satin.
The finish you select will impact the final look of your artwork, so consider your desired aesthetic carefully.
Step 8: Pick the Appropriate Brush
The choice of brush matters. Opt for either a foam brush or a soft bristle brush. A foam brush tends to work well for a smoother finish, while a soft bristle brush can be better for detailed work.
Ensure your brush is clean and in good condition to avoid imperfections in the varnish.
Step 9: Apply Thin, Even Coats
Start the varnishing process by applying a thin, even coat of acrylic varnish to the wood surface.
Brush in the direction of the wood grain to create a uniform appearance. Avoid overloading your brush with varnish, as this can lead to drips or uneven coverage. Thin coats are easier to work with and provide a more consistent finish.
Step 10: Allow Drying
Once you’ve applied the initial coat of varnish, it’s essential to be patient during the drying phase.
The drying time varies depending on environmental conditions such as temperature and humidity.
Typically, it takes about 30 minutes to an hour for the first coat to dry. It’s crucial to allow this coat to dry completely before proceeding to the next steps.
Step 11: Repeat as Necessary
Depending on your project and the level of protection and finish you desire, you may need to apply additional coats of varnish.
To do this, follow the same process: thin, even coats in the direction of the wood grain. Allow each coat to dry fully before adding another layer.
Typically, two to three coats provide adequate protection and a satisfying finish, but you can adjust the number of coats based on your preferences.
Step 12: Final Touches and Curing
After applying the sealer, it’s essential to allow your artwork to cure properly.
Curing is the process in which the sealer fully dries and hardens, providing a durable protective layer. To do this:
- Place your sealed artwork in a dust-free area.
- Allow it to cure for at least 24 hours or follow the curing time specified on the sealer’s label.
During the curing process, it’s important to resist the temptation to touch or handle your artwork to prevent smudging or imperfections in the sealer.
What to use to seal acrylic paint on wood
There are many different types of acrylic paint sealers, each with its advantages and disadvantages.
Here is a brief overview of some of the most popular types of sealants:
1. Polyurethane
Polyurethane, a synthetic resin, commonly seals acrylic paint due to its versatility in application methods.
It resists weathering, fading, and chipping, providing durable protection against damage. It can also impart a glossy finish.
However, compatibility with paint types varies, and it may yellow over time, making it challenging to remove once applied.
Despite drawbacks, polyurethane remains the preferred wood sealant for acrylic painters.
2. Furniture Wax
Furniture wax is a popular choice for sealing acrylic paint on wood. It comes in clear or tinted formulas and can be applied with a soft cloth or sponge brush.
It offers protection against scratches and enhances the paint’s finish, whether glossy or matte.
However, check compatibility with your paint type before use. Test it on a small area first.
Furniture wax is easy to find at hardware stores and is an unconventional but effective way to protect painted furniture.
3. Polyacrylic Sealant
Polyacrylic sealant is a clear, water-based product that can be used to seal acrylic paint on wood.
It is available in matte and glossy finishes and can be applied using a brush or roller.
Polyacrylic sealant dries quickly and provides a durable, protective barrier against scratches and other damage.
Additionally, it is resistant to yellowing and fading, making it an ideal choice for outdoor surfaces.
How to apply polyacrylic sealant
- To apply polyacrylic sealant, start by stirring the product thoroughly.
- Next, apply a thin, even layer to the surface of the furniture using a brush or roller.
- Once the sealant has been applied, it will need to be left to dry for 24 hours before use.
4. Clear Sealant for Wood
Clear wood sealant protects acrylic paint on wood, preventing damage. It’s suitable for both finished and unfinished wood.
Choose a non-yellowing sealant with your preferred matte or glossy finish.
Ensure it doesn’t leave visible brushstrokes. Water-based sealants are easier to handle and clean up.
How to apply clear sealant for wood
When it comes to how to seal acrylic paint on wood, there are a few different methods that you can use.
One option is to brush a thin coat of the sealant onto the surface of the wood. This method is typically best for small projects or areas where you need to be very precise with your application.
Another option is to spray the sealant onto the wood surface. This method is often best for larger projects or areas where you need to cover a larger area quickly.
Regardless of which method you choose, it is always a good idea to test the sealant on a small area of the wood first to make sure that you are happy with the results.
- Once you have applied the clear sealant to the wood surface, you will need to allow it to dry completely before proceeding.
- This can take anywhere from a few hours to a few days, depending on your product. Once the sealant is dry, you can then proceed with applying your acrylic paint.
- It is important to note that clear sealants are not typically necessary for outdoor projects.
- However, if you are working on an outdoor project that will be exposed to the elements, it is always a good idea to use a clear sealant to protect your work.
5. Varnish
Varnish, a clear acrylic paint sealant, safeguards paintings from dirt, dust, and UV rays while imparting a glossy, professional finish.
Though not always essential, it’s beneficial for artworks in high-traffic areas or exposed to direct sunlight.
Varnish comes in water-based and oil-based formulas, so choose accordingly. Applying varnish is a simple process—brush it on evenly and let it dry.
Should you ever want to alter your painting’s appearance, varnish can be easily removed with fungicide.
6. Glaze
Glaze is often used as an acrylic paint sealant. It is a clear or opaque coating that is applied over an existing layer of paint.
Glaze can be used to protect the paint from damage, enhance the paint’s color or sheen, or change the paint’s color.
The finish is also used to create special effects, such as faux finishes. Glaze is available in a variety of different finishes, such as matte, high-gloss, satin or flat.
Glaze can also be tinted with colorants to create a variety of different effects. Glaze is typically applied with a brush or roller and then allowed to dry.
7. Epoxy Resin
Epoxy resin is a synthetic polymer with many uses, including an acrylic paint sealant. Epoxy resin is made up of two parts, a resin, and a hardener.
When these two parts are mixed together, they create a tough, durable material that can be used to protect surfaces from scratches, UV light, and water damage.
Epoxy resin is often used as a clear coating on wood or metal surfaces, but it can also be tinted with pigments to create a variety of colors.
While epoxy resin is more expensive than other paint sealants, its durability and versatility make it worth the investment.
8. Gel Medium
Gel medium is a thickening agent that is used to make acrylic paint thick to change its consistency. Gel medium can also be used as an acrylic paint sealant.
When mixed with acrylic paint, gel medium will create a thick, glossy finish that is perfect for protecting wooden surfaces from scratches and UV light.
Gel medium is available in a variety of different finishes, such as matte, satin, or high-gloss.
Gel medium can also be tinted with colorants to create a variety of different effects. Applying gel medium is easy – simply mix it with your paint and then brush it on evenly.
See Also: Can I Paint My Guitar
9. PVA Glue
PVA glue is a type of glue that is often used as an acrylic paint sealant. PVA glue is made from polyvinyl acetate, which is a synthetic polymer.
PVA glue has many uses, including as an adhesive, a bonding agent, and a sealant.
When mixed with acrylic paint, PVA glue will create a tough, durable surface that is perfect for protecting surfaces from scratches and UV light.
PVA glue is available in a variety of different finishes, such as matte, satin, or high-gloss. PVA glue can also be tinted with colorants to create a variety of different effects.
How to waterproof acrylic paint on wood
- To apply PVA glue as a sealant, you will need to mix it with your paint. Once the glue is mixed with the paint, you can then brush it on evenly.
- The amount of time it takes for the glue to dry will vary depending on the product you use, so be sure to follow the manufacturer’s instructions.
- Once the glue is dry, it will create a tough, durable surface that will protect your painting from damage.
10. Mod Podge
Mod Podge is a type of decoupage medium that can be used as an acrylic paint sealant. Mod Podge is made from polyvinyl acetate, which is a synthetic polymer.
Mod Podge has many uses, including as an adhesive, a bonding agent, and a sealant.
When Mod Podge is applied over acrylic paint, it will create a tough, durable surface that is perfect for protecting surfaces from scratches and UV light.
Mod Podge is available in a variety of different finishes, such as matte, satin, or high-gloss.
Mod Podge can also be tinted with colorants to create a variety of different effects.
How to apply Mod Podge as a wood sealant
- To apply Mod Podge as a wood sealant, you will need to mix it with your paint. Once the Mod Podge is mixed with the paint, you can then brush it on evenly.
- The amount of time it takes for the Mod Podge to dry will vary depending on the product you use, so be sure to follow the manufacturer’s instructions.
- Once the Mod Podge is dry, it will create a tough, durable surface that will protect your painting from damage.
Best sealant for acrylic paint on wood
The best sealant or clear coat for acrylic paint on wood is polyurethane. Polyurethane sealers come in various finishes, including matte, satin, and gloss, offering both protection and a smooth finish for your artwork or project.
How to seal acrylic paint on cutting board
To seal acrylic paint on a cutting board, ensure the paint is fully dry. Gently sand the surface for smoothness.
Apply a food-safe sealant like mineral oil or beeswax, rubbing it evenly across the board. Allow it to soak for 20-30 minutes, then wipe off excess.
Let it dry completely, and repeat if necessary for added protection. Your cutting board is now sealed and safe for use.
How to seal acrylic paint without varnish?
The first option is to use Mod Podge, a popular choice for craft projects. Apply thin, even layers of Mod Podge using a foam brush or soft bristle brush, allowing each layer to dry before adding more.
This versatile adhesive and sealer provides protection without a glossy finish.
Additionally, you can explore other options such as acrylic medium, clear gesso, or fixative spray, depending on your desired outcome and project requirements.
Can I use mod podge to seal acrylic paint on wood?
Yes, you can use Mod Podge to seal acrylic paint on wood. Mod Podge is a popular choice for sealing acrylic paint, providing protection and a glossy finish.
To use it, apply thin, even layers with a foam brush or soft bristle brush, allowing each layer to dry before adding more.
Mod Podge is versatile, making it suitable for various artistic and craft projects on wood surfaces.
Consideration when picking top coat for acrylic paint
When choosing an acrylic paint sealant, there are a few things that you should keep in mind.
Non-yellowing
One of the most important things to look for in an acrylic paint sealant is that it doesn’t yellow over time.
Acrylics are known for their lightfastness, but even the best quality paints can start to appear amber yellow in color after a few years if they’re not properly sealed.
A non-yellowing sealant will help to keep your paintings looking bright and vibrant for years to come.
In addition, a good sealant will also protect your paintings from UV damage, fading, and other environmental factors.
When choosing a sealant, read the label carefully to ensure that it will provide the level of protection you need.
Finish (matte or glossy – select your preference)
Another thing to consider when choosing an acrylic paint sealant is the finish. Sealants are available in a variety of different finishes, including matte, satin, and high-gloss.
The type of finish that you choose will depend on your personal preference. For example, if you want a glossy finish, select a gloss finish for acrylic paint specifically designed for use with acrylics, such as glossy acrylic medium sealant.
If you prefer a matte finish, there are also sealants that can provide this type of finish.
Interesting Read: How to Make Paint Translucent
Brushstrokes will not show
When sealing a painting, you want to ensure that the sealant goes on evenly and doesn’t leave any brush strokes behind.
A good sealant will self-level, meaning that it will smooth out as it dries. This will help create a smooth surface that won’t show any brushstrokes.
Self-leveling
As we mentioned before, a good sealant will self-level as it dries. This means that it will smooth out any imperfections and create a uniform surface.
This is important because you want your sealant to dry evenly and smoothly without brushstrokes or streaks.
Simple to clean up
Another thing to look for in an acrylic paint sealant is that it is simple to clean up. This means it won’t leave any residue or streaks when you’re finished applying it.
A good sealant will also be water-based, so it will clean up easily with soap and water.
Water-based
When sealing a painting, you want to ensure that the sealant is water-based. This means it won’t damage the paint or the surface you’re sealing.
Water-based sealants are also easy to clean up, so you won’t have to worry about leaving any streaks or residue behind.
This usually takes about 24 hours. Once it’s dry, you can enjoy your newly sealed surface!
Tips for Sealing Painted Wood
The following are tips for sealing painted wood:
- First, make sure the surface is clean and dry before you start.
- Then, apply the sealant evenly and smoothly.
- Let it dry completely before using the surface.
- If you’re using a brush or roller, apply the sealant in even, overlapping strokes.
- If you’re using a sprayer, hold it about 12 inches from the surface.
How to Seal Acrylic Paint on Glass
Sealing acrylic paint on glass differs from sealing it on wood.
This is because glass is a non-porous surface, so you don’t need to worry about the paint being absorbed by the glass.
To seal acrylic paint on glass, you will need:
- A brush/roller/sprayer
- An acrylic paint sealant
- A clean, dry cloth
Good news! The old paint is removable whenever you need to change it. (Here’s a how to get old paint off glass).
See Also: Can I Paint My Guitar
How to Seal Acrylic Paint on Plastic
Acrylic paint is a versatile medium that can be used on a variety of surfaces, including plastic.
However, unlike other surfaces, plastic is not porous, so the paint has a tendency to crack and peel.
To avoid this problem, you need to seal acrylic paint on plastic with a clear finish. There are several types of sealers that can be used, but the best one for plastic is polyurethane.
- To apply polyurethane, first lightly sand the surface of the plastic with fine-grit sandpaper to create a smooth surface.
- Then, apply a thin layer of polyurethane with a brush or roller and allow it to dry for 24 hours.
- Once it is dry, apply a second coat and let it dry for another 24 hours. After the final coat has dried, you can then apply a layer of furniture wax to protect the finish.
How Seal Acrylic Paint on Phone Case
Can you paint a phone case? Absolutely! Painting a phone case with acrylic paint is a popular way to customize and add a personal touch to your device.
After thoroughly cleaning the surface, apply a primer suitable for the phone case material. Then, paint your desired design using acrylic paint.
Once the paint has dried completely, seal it with a clear sealant to protect the design and ensure its longevity.
With a little creativity and proper sealing, you can transform your phone case into a unique and eye-catching accessory.
Sealers Versus Primers
One thing to keep in mind when selecting a sealant is that there are two different types: sealers and primers.
Sealers are designed to protect the surface from damage, while primers are designed to help the paint adhere to the surface.
When sealing a painting, you want to ensure that you’re using a sealer and not a primer. Primer is best used when painting wood.
3 Mistakes to Avoid
Sealing acrylic paint on wood is a crucial process to protect the artwork, but there are potential mistakes to avoid.
- Choosing an Incompatible Sealer: The chemical compatibility between the acrylic paint and the chosen sealer is vital. Using a sealer with solvents or components that react adversely with the acrylic paint can lead to irreversible damage.
- Inadequate Drying Time: Rushing the drying process of acrylic paint before sealing can trap moisture within the layers. This trapped moisture can cause delamination, cracking, or a cloudy appearance over time.
- Incorrect Surface Preparation: Improperly preparing the wood surface can hinder the adhesion of both the acrylic paint and the sealer. Neglecting the sanding step or using incompatible primers can result in poor bonding and reduced overall durability.
Related Post:
How to Remove Acrylic Paint from Wood
How to Get a Smooth Paint Finish on MDF
FAQs
What is the best way to seal acrylic paint on wood?
There are many different ways to seal acrylic paint on wood. Some of the most popular options include varnish, polyurethane, and polyacrylic sealant.
How do you seal acrylic paint on wood for outdoors?
If you want to seal acrylic paint on wood for outdoors, you can use a variety of different products, including polyurethane, furniture wax, and clear sealant.
Is varnish the same as sealant?
No, varnish is not the same as sealant. Varnish is a type of sealant, but there are many other types of sealants on the market.
Can I varnish over acrylic paints on wood?
Yes, you can varnish over acrylic paint on wood. However, it is important to ensure that the paint is completely dry before applying the varnish. Otherwise, the varnish may not adhere properly.
Is acrylic paint waterproof on wood?
Acrylic paint is considered waterproof once it has dried. However, there are a few factors that can affect this, such as the type of paint, the type of wood, and how the paint is applied. For example, if you are painting a piece of furniture that will be outdoors, you will want to use a waterproof acrylic sealer over the paint to protect it from the elements.
Conclusion
So there you have it! These are the best ways to seal acrylic paint on wood. Whether you’re looking for a varnish, polyurethane, or clear sealant, we’ve got you covered.
So what are you waiting for? Get out there and start sealing your acrylic painting! Thanks for reading!


Leave a Reply