Tips and acrylics are two of the most common artificial nails.
Typically, tips lengthen the nails, while regular acrylics enhance and protect them. But both are beautiful and highly fashionable.
Unfortunately, they share so much that they can be confusing. So, you may struggle to choose between the two.
We’ve prepared this guide to explain the differences to help you make the right decision.
Nail tips vs acrylics
Nail tips elongate and beautify the nails but are weaker. So, tops are ideal for events and occasions. Meanwhile, regular acrylics are strong and durable. So, they’re great for regular manicures.
What’s a Nail Tip?�?
Nail tips are nail-shaped plastic pieces nail technicians use to elongate the nail. They serve as artificial nail tips.
Specifically, they are made from Acrylonitrile Butadiene Styrene (ABS) plastic. ABS is a tough and durable plastic.
But more importantly, it has exceptional insulating properties and enviable impact resistance.
Also, it doesn’t stain or abrase easily, maintaining an excellent surface aspect for a long time.
Colorless tips are the most common. But colored options are available to add more spark to your manicure. Nearly all tips are transparent.
How to Apply Nail Tips
Applying tips is easy. So, you can do it at home without professional help. Here’s how to install your tips;
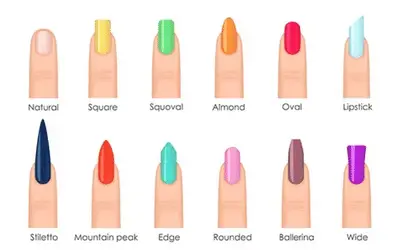
Choose the desired length and shape:�?Do you need longer tips? If so, how long?
Also, choose the desired shape, ensuring the artificial C-curve matches the c-curve on your natural nail. You may need to try on multiple tips to find one that matches.
Prepare the nails:�?First, wash your nails with soap and water to remove dirt, debris, and oils.
Then dry them. After that, trim your nails and buff them. Then push back the cuticles.
Apply top coat (optional):�?A top coat isn’t mandatory and often results in a weaker bond.
But it protects your natural nails from harmful chemicals and makes it easier to remove fake nails.
Apply adhesive glue:�?Nearly all nail tip packages include an adhesive gel to stick the tips to the natural nail plate. Alternatively, purchase adhesive glue separately.
Apply the tips:�?Press the tip onto the nail plate for about five seconds to form a strong bond. Then repeat the process for all the nails.
Finish up:�?Trim and shape the tips. Then paint them with nail polish or apply gel or acrylic manicure. Alternatively, you can rock transparent tips.�?
Benefits of Nail Tips
- Tips give you long artificial nails.
- You can choose any nail length.
- They’re easy to install.
- Tips are beautiful and fashionable.
Drawbacks of Nail Tips
- Tips require regular nail fill ins, making them expensive.
- The removal process may ruin the natural nails.
Types of Nail Tips
The three main types of nail tips are standard, acrylic, and gel. Some people prefer to wear standard tips without gel or acrylics.
If so, you may paint them with nail polish, though clear, transparent tips are just as fashionable.
Meanwhile, gel and acrylic tips are beautifying extensions. The nail tip serves as a base for developing acrylic or gel extensions.
Artificial gel nails are more popular as they’re lighter and natural-looking. Also, gel nail extensions are highly trendy. Nonetheless, acrylic tips are just as attractive.
What are Acrylic Nails?�?
“Acrylic nails” is the catch-all phrase for manicures involving acrylic products, including acrylic overlay nails and extensions.
But in everyday lingo, it means medium-sized nails decorated using acrylic monomer and powder.
When comparing acrylic nails to gel nails, the main difference is that acrylics are two-part manicures that cure naturally.
Meanwhile, gels are one-part resins cured under LED lamps or UV light.
How to Apply Acrylic Nails
Applying regular acrylics is simple. You require a liquid monomer, powder polymer, and an applicator brush.
Remove the old manicure:�?Acrylics require a clean nail plate, free of old manicures, to cure strongly.
Prep the nails:�?Wash your nails with water and soap. Then dry, trim, and buff them to create a rough surface.
When done, wipe them to remove the debris. Then push back the cuticles.
Apply nail primer:�?A dehydrating nail primer “dries” the nail surface to enhance adhesion.
Beware that too much of it may cause overly dry nails, leading to cracking.
Make an acrylic bead: First, dip the rush in the monomer liquid and tap off the excess liquid on the sides of the container.
Then dip the monomer-loaded brush into the polymer powder to make a bead. The monomer-to-polymer ratio is vital.
Apply the manicure:�?Spread the bead, starting in the cuticle area and working down to the nail tip. Light, even coats are best.
Remember, acrylics are thinnest at the cuticle and thickest at the nail tip. Apply more beads if necessary.
Then spread them properly and allow the manicure to dry for half an hour.
Apply a top coat:�?A top coat protects the acrylic manicure while adding a glossier, more reflective surface.
Again, spread a thin, even layer for the best-looking acrylics. Then allow it to dry for 30 minutes.
Finish up:�?File the nails to the desired length and shape them using a nail file. Then rub cuticle oil onto your fingers and apply hand lotion.
Interesting read: Who invented acrylic nails?
Advantages of Acrylic Nails
- Acrylics are strong and durable.
- Acrylic nails last up to four weeks with good maintenance.
- Provide a smooth surface for nail art application.
- You can style and shape the nail into many designs.
Drawbacks of Acrylic Nails
- They’re difficult to remove.
- You need regular touchups.
- Acrylics may damage your nails.
Types of Acrylic Nails
There are at least three types of acrylic nails. Full-cover acrylics are the regular manicures you get at the nail salon, while overlays are lighter versions of full-cover manicures.
Meanwhile, acrylic nail extensions elongate the natural nail. You can create an extension using tips or a nail form.
You can also opt for short square acrylics if you do not love overly long nails.
What is the difference between tips and acrylics?�?
Now we have a basic idea of nail tips and acrylic manicures. So, let’s get a head-to-head comparison to help you choose the best option for your next manicure.
Acrylics vs. Nail Tips: Definitions
Acrylic nails are manicures formed using acrylic beads. An acrylic bead is the product of a liquid monomer and powder polymer.
The nail tech forms a bead by dipping a brush into the monomer and then the polymer (not the other way around).
The three main types of acrylic nails are full-cover, overlays, and acrylic extensions.
Meanwhile, nail tips are a type of extension comparable to nail forms. Both elongate the nail.
However, tips remain in place, forming part of the nail even after the manicure.
On the other hand, forms only help create the extension and are later removed. Acrylic and gel tips are the most common.�?
Thus, “tips” and “acrylics” mean the same thing if you get acrylic extensions with tips. Otherwise, they’re different.�?�?
Nail Tips vs. Acrylics: Application Process
The process of applying regular acrylics varies significantly from nail tips. First, regular acrylics require an acrylic monomer and powder polymer.
Meanwhile, you can make tips using gels or acrylics but require plastic tips to shape the extensions.
The actual application processes differ too. To apply regular acrylics, apply an acrylic bead directly onto the natural nail plate, working from the cuticle area to the tip. Then allow it to dry before applying a top coat.�?
Meanwhile, to apply tips, the nail technician first glues the plastic tip to the nail plate and allows it to dry.
Then they apply an acrylic bead or gel manicure to the tip and let it cure.
Tips vs. Acrylic Nails: Strength and Durability
Regular acrylics are stronger than nail tips, acrylic or gel-based. They are stronger than regular gel nails.
So, naturally are much more durable than gel nail tips. Whereas regular acrylics can last 3-4 weeks, gel tips typically last 2-3 weeks.
Similarly, shorter acrylics last longer than acrylic extensions because longer nails are more likely to crack and break under pressure or weight.
But this time, the difference is minimal, depending on the length of the extensions.
Remember to fill the cuticle area every 1-2 weeks to prolong the life of the acrylics and tips. Also, regularly file the edges to maintain the desired shape and length.
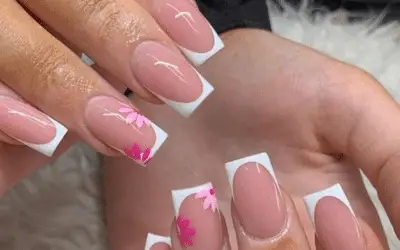
Nail Tips vs. Acrylics: Which One is More Gorgeous?
Longer nails are naturally more attractive. So, properly-done tips set you apart.
Moreover, extensions provide more surface area for nail art, from polka dots to gradient effects.
You can have art with regular acrylics as well. But the possibilities are limited by the small surface area.
Gel extensions are the most gorgeous. They’re lightweight and comfortable. Also, they appear and feel more natural. Remember to apply gel polish for the perfect nails.
Alternatively, you can apply regular nail polish. They’re technically the same. But gel polish cures faster under UV or LED light.
Artificial Nail Tips vs. Acrylic Nails: Which is Safer for the Natural Nails?
Unfortunately, all nail enhancements are unsafe for your nails. First, they contain chemicals that may corrode the nail plate, causing itching and inflammation.
Also, chemicals can cause redness and swelling if splashed on the cuticles or the surrounding skin.
Above all, installing and removing artificial nails is often an aggressive process that thins and damages the nail, increasing the risk of injuries and infections.
That said, acrylic manicures are more damaging than other artificial enhancements.
For instance, you must remove substantial material from the nail plate for acrylics to cure strongly.
Additionally, acrylics form extra-strong bonds that take significant effort to remove. This often means more damage to the nail bed and plate.
Tips vs. Acrylic Nails: The Removal Process
The removal process is generally the same, but the ease of removal varies. Tips are easier to remove.
Acetone-based nail polish removers are the best solvents to remove regular acrylics and nail tips.
It’s a powerful solvent that breaks down the bonds holding the acrylic or gel products, loosening the material for easy removal.
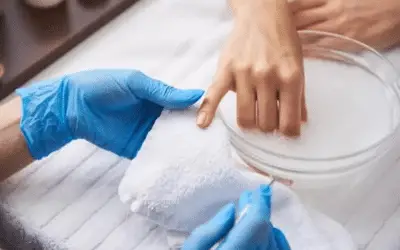
Soak cotton balls in the nail polish remover. Then cover your fingers with the cotton balls and wrap them in aluminum foil for 2-3 minutes. Finally, use a cuticle stick to remove the acrylics or tips.
Besides acetone-based nail polish remover, you can use 100% acetone or non-acetone polish remover.
Alternatively, consider rubbing alcohol, isopropyl alcohol, or vinegar solution.
Here’s how to use vinegar to remove acrylic nails.
Soak the hands in warm, soapy water for 10-15 minutes if you have none of the above products.
Tips vs. Acrylic Nails: Cost
Again, the costs vary depending on the type of tips or acrylics. But acrylics tend to be more expensive than regular tips.
A regular set of acrylic nails costs $30 to $45 to install at the nail salon. Meanwhile, a set of standard nails costs $20 to $25.
Generally, the cost of acrylics depends on the type, length, and styling.
For instance, overlay acrylics are cheaper than regular acrylics, which are more affordable than acrylic extensions.
Meanwhile, the cost of nail tips depends on size, strength, and stylistic enhancements.�?
The maintenance costs are about the same. For instance, an acrylic fill price is around $15-$30. You need a fill-in every 1-2 weeks.
Similarly, it costs about $20 to fill nail tips, and you can refill them every 2-3 weeks to wear them longer.
Now that we have known the cost of installing artificial nails, let’s find out the acrylic removal cost.
Nail Tips Vs Acrylic Comparison Guide Table
| Nail Tips | Acrylics | |
|---|---|---|
| Definition | Extensions | Formed with liquid monomer and powder polymer |
| Application process | Glued to nail plate, then acrylic or gel applied to tip | Acrylic bead applied directly to natural nail plate |
| Strength and durability | Not as strong or durable as acrylics | Stronger and more durable than nail tips |
| Removal process | Easier to remove | Harder to remove |
| Cost | Less expensive than acrylics | More expensive than nail tips |
| Appearance | Less attractive than acrylics | Attractive, come in various styles and colors |
| Safety | May damage natural nail, less damaging than acrylics | Can be damaging to natural nail, substantial material removed |
| Maintenance | Refilled every 2-3 weeks | Refilled every 1-2 weeks |
FAQs
Can you sublimate nail files?
No, you cannot sublimate nail files. Sublimation on acrylic is possible, but nail files are typically made of materials like sandpaper or metal, which are not suitable for the sublimation process. Sublimation works best on polyester-based items with a special coating.
Verdict�?
Both tips and regular acrylics are beautiful and durable. Also, both are cost-effective manicures lasting up to a month with good maintenance.
But they’re different in many ways, thus suited for different purposes.
When to Wear Regular Acrylics:�?Regular acrylic nails are what everyone wears to protect and beautify the nails without special plans.
Wear short ones to look beautiful without attracting unnecessary attention.
When to Wear Nail Tips:�?Tips are best for occasions and events, especially extra-long ones.
They announce your presence and combine exceptionally with nail polish and art. Pair them with a flashy outfit to grab attention.�?

Leave a Reply