In the world of nail art and enhancement, acrylic nails are a popular choice.
They provide a strong, durable alternative to natural nails and offer the opportunity to experiment with various designs and styles.
However, as acrylic nails grow out, they require maintenance to keep them looking their best.
This is where acrylic fill comes in. In this article, we’ll explore what acrylic fill is, the different types available on the market, the benefits of using it, and how to prepare for and apply it properly.
What Is An Acrylic Fill?
An acrylic fill is a maintenance procedure for acrylic nails. It involves removing the lifted or grown-out acrylic layer and refilling it with fresh acrylic material to restore the shape, thickness, and length of the nails.
Acrylic Fill Overview- What is It and Why Use It
Acrylic fill is the process of removing the old, grown-out acrylic material from the nails and replacing it with fresh acrylic material.
This process helps to maintain the structural integrity and appearance of acrylic nails. Acrylic fill is also known as acrylic refill, acrylic maintenance, or simply fill.
Acrylic nails are made of a combination of liquid and powder, which creates a hard, durable coating on the nails.
Over time, as the natural nail grows, the acrylic material on top of it begins to separate and move away from the nail bed. This separation creates a visible gap, which can detract from the appearance of the nails.
Acrylic fill helps to address this issue by removing the old, grown-out material and replacing it with new acrylic material.
This process helps to maintain the strength, durability, and appearance of the nails.
Acrylic fill is a popular choice for people who want to maintain long, beautiful nails without waiting for their natural nails to grow.
It’s also an excellent option for people with weak, brittle, or damaged natural nails who need a stronger, more durable alternative.
Read also: Can you change acrylic nail color when getting a fill?
Different Types of Acrylic Fill Available on the Market
There are several types of acrylic fill available on the market, each with its unique advantages and disadvantages.
Here are some of the most common types of acrylic fill available:
- Traditional Acrylic Fill: This is the most commonly used type of acrylic fill. It’s made of a mixture of liquid and powder that is applied to the nails to create a hard, durable coating. Traditional acrylic fill is known for its strength and durability, making it an ideal option for people with weak, brittle nails.
- Gel Acrylic Fill: This type of acrylic fill is a combination of traditional acrylic fill and gel. It’s typically used for people who prefer the flexibility and natural appearance of gel nails but also want the durability of traditional acrylic fill.
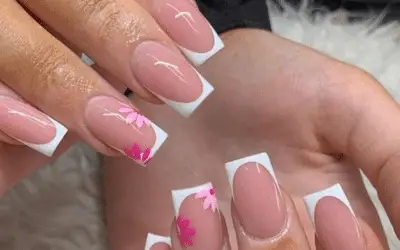
- Pink and White Acrylic Fill: This type of acrylic fill is a combination of traditional acrylic fill and a pink or white powder. It’s commonly used to create a French manicure look and is an excellent option for people who want a natural-looking, subtle appearance.
- Glitter Acrylic Fill: This type of acrylic fill is a combination of traditional acrylic fill and glitter. It’s perfect for people who want to add a bit of sparkle to their nails.
- Dip Powder Acrylic Fill: Dip powder acrylic fill is a newer technique that involves dipping the nails into colored powder and then sealing with a clear acrylic topcoat to create a long-lasting, durable finish.
Benefits of Choosing an Acrylic Fill for Your Projects
Acrylic fill offers several benefits that make it a popular choice among people who want to maintain the appearance and strength of their nails.
Here are some of the benefits of choosing an acrylic fill for your projects:
- Strength and Durability: Acrylic fill creates a hard, durable coating on the nails that helps protect them from breakage and damage. This is especially important for people who have weak or brittle nails and need a stronger alternative.
- Versatility: Acrylic fill can be used to create a wide range of nail designs, from simple and natural to elaborate and decorative. This makes it a versatile option for people who want to experiment with different nail styles and looks.
- Long-Lasting: Acrylic fill typically lasts for two to three weeks, depending on the individual’s nail growth rate and the amount of wear and tear the nails are subjected to. This makes it a long-lasting option that requires less maintenance than other types of nail enhancements.
- Customizable: Acrylic fill can be customized to suit the individual’s preferences and tastes. This allows people to create unique and personalized nail designs that reflect their personal style.
- Cost-Effective: Acrylic nail fill price is a cost-effective choice for people who want to maintain long, beautiful nails without spending too much money. It’s also a great option for those who don’t have the time or budget to go to the nail salon frequently.
Preparing for an Acrylic Fill – Things to Consider Before Starting the Project
Before starting an acrylic fill project, there are several things to consider to ensure that you achieve the desired results.
Here are some things you should keep in mind:
- Clean your nails: Before starting the project, ensure that your nails are clean and free of any old nail polish or debris. Use nail polish remover and a cotton pad to clean your nails thoroughly. Find out how to clean under acrylic nails in our guide.
- Evaluate the condition of your nails: Take a close look at your nails and assess their condition. If your nails are damaged or broken, it’s best to wait for them to heal before doing a fill.
- Choose the right tools: Make sure that you have all the necessary tools for the project, including an acrylic powder, liquid monomer, a brush, a buffer, and a topcoat.
- Decide on the shape and length: Decide on the shape and length that you want your nails to be. This will help you choose the right acrylic powder and ensure that the nails are shaped correctly.
- Practice your technique: If you’re new to doing acrylic fills, it’s a good idea to practice your technique on a fake nail or on a friend before starting on your own nails.
- Take breaks: Acrylic fills can be time-consuming, so take breaks as needed to avoid fatigue and ensure that you’re able to do a thorough job.
- Consider the maintenance: Acrylic nails require regular maintenance to keep them looking good. Make sure that you’re willing to commit to this before starting the project.
The Process of Applying an Acrylic Fill to a Surface
Here are the general steps involved in applying an acrylic fill to a surface:
- Preparation: Begin by preparing the nails for the acrylic fill. This involves removing any old nail polish such as gel nail polish on your acrylic nail, trimming and shaping the nails, and pushing back the cuticles. Use a buffer to lightly buff the surface of the nails to create a rough surface that the acrylic can adhere to.
- Applying the primer: Apply a thin coat of primer to the entire nail. The primer helps the acrylic adhere to the natural nail.
- Applying the acrylic: Dip the brush into the acrylic liquid monomer (acrylic mixture), or any other substitute for acrylic liquid, and then into the acrylic powder to create a ball of acrylic. Place the ball of acrylic onto the nail and then use the nail brush to spread it evenly across the surface. Continue this process until all of the nails are covered in acrylic.
- Shaping the acrylic: Once the acrylic has been applied, it’s time to shape the nails. Use a file to shape the acrylic to the desired length and shape. Be careful not to file too much or too aggressively, as this can damage the natural nail.
- Buffing and smoothing: Use a buffer to smooth out any rough spots and create a smooth surface. This step is important to ensure that the nails look natural and are not lumpy or uneven.
- Applying the topcoat: Apply a layer of topcoat to the nails to add shine and protect the acrylic.
- Finishing touches: Once the topcoat has dried, you can apply any additional nail art or decorations as desired.
Common Mistakes to Avoid When Applying Acrylic Nail Fill
Here are some common mistakes to avoid when applying an acrylic fill:
- Over-filing: One of the most common mistakes is over-filing the natural nail or the acrylic, which can weaken the nails and cause damage. Be careful not to file too much or too aggressively, and use a light touch when shaping and smoothing the nails.
- Using too much acrylic: Using too much acrylic can result in thick, lumpy nails that don’t look natural. Use a small amount of acrylic and build up gradually to achieve the desired thickness.
- Not using enough nail primer: Primer is essential for ensuring that the acrylic adheres properly to the natural nail. Make sure to apply a thin, even coat of primer before applying the acrylic.
- Not letting the acrylic dry completely: It’s important to let each layer of acrylic dry completely before applying the next layer or shaping the nails. Failing to do so can result in lumpy, uneven nails.
- Applying acrylic too close to the cuticle: Applying acrylic too close to the cuticle can cause lifting and can be uncomfortable for the client. It can also damage the nail plate. Leave a small gap between the acrylic and the cuticle to avoid this problem.
- Using the wrong tools: Using the wrong tools can make the acrylic fill process more difficult and can result in uneven, lumpy nails. Make sure to use high-quality brushes, files, and buffers that are designed for use with acrylic nails.
- Skipping the topcoat: Skipping the topcoat can cause the acrylic to chip and can make the nails look dull. Always apply a topcoat to protect the acrylic and add shine.
Tips for Getting More From Your Acrylic Fill Project
- Choose the right acrylic powder: There are many different types of acrylic powder available, each with its own unique properties. Choose a powder that is suited to your needs and preferences, such as a powder with a fast drying time or a powder that is easy to work with.
- Experiment with nail art: Acrylic nails provide a great canvas for nail art, so don’t be afraid to experiment with different designs and techniques. You can add glitter, rhinestones, or even hand-painted designs to create a unique and personalized look.
- Use a high-quality topcoat: A high-quality topcoat can help to protect your acrylic nails and make them last longer. Look for a topcoat that is designed specifically for use with acrylic nails and that provides a strong, durable finish.
- Moisturize your nails regularly: Acrylic nails can be drying, so it’s important to moisturize your nails and cuticles regularly. Use a cuticle oil or a moisturizer specifically designed for use with acrylic nails to keep your nails looking healthy and hydrated.
- Maintain your nails: To keep your acrylic nails looking their best, it’s important to maintain them regularly. This includes filling in the growth every two to three weeks, avoiding harsh chemicals and excessive water exposure, and being gentle with your nails.
FAQs
What does it mean to get acrylics filled?
Getting acrylics filled is removing the old acrylic from the existing acrylic nail and replacing it with new, fresh acrylic. This process helps extend the manicure’s life and keep your nails neat and tidy.
What happens during an acrylic fill?
During an acrylic fill, the old acrylic is removed from the nails, and a new layer of acrylic is applied together with gel polish. The nail technician will shape and buff your nails to achieve the desired look and may also add nail art or other decorative elements. Once the new acrylic is applied, a topcoat is added for protection and shine.
Should I get a fill or new acrylic nails?
It depends on how long it has been since your last fill or new set. Generally, if it has been over three weeks since you had a fill or new set, you should get a new one. A fill may suffice if it has been less than three weeks. Your nail tech can help you make the best decision for your nails.
Related read: How many times can you get acrylics filled?
How long does an Acrylic fill last?
An acrylic fill typically lasts two to three weeks, depending on how quickly your nails grow. After two to three weeks, it’s time for a new fill or set. Regular maintenance is important for keeping your acrylic nails looking fresh and flawless.
How much do acrylic nails cost?
Acrylic nail prices can vary. On average, a full set can cost around $25 to $80, with an average price of around $50. For more information, read our article “How much does it cost to get acrylic nails?”
Why do my nails grow so fast with acrylics?
The perception of faster nail growth with acrylics is often due to nail growth under acrylic. This brings a contrast between the visible natural nail growth and the acrylic extensions. In reality, acrylics do not speed up nail growth. The acrylic extensions create a noticeable difference between the natural nail growth and the tip of the acrylic.
Summing Up: What is an Acrylic Fill?
An acrylic fill is a process that involves removing the existing acrylic from your nails and replacing it with fresh acrylic.
This helps to extend the life of your manicure and keep your nails looking neat and tidy.
The process includes filing, buffing, applying new acrylic powder, and adding a topcoat for protection.
With regular maintenance and care, you can keep your acrylic nails looking fresh and beautiful for week.


Leave a Reply