Hydro dipping or water transfer printing may be the perfect solution for you if you’re looking to add a creative and unique touch to your objects.
The acrylic pouring dip technique involves using water and paints to create beautiful designs on different surfaces.
While many different types of paints can be used for this purpose, acrylic paint is one of the most popular options.
This blog post will explore how to hydro dip with acrylic paint and provide tips on getting the best results.
How to Hydro Dip with Acrylic Paint
- Mix water and borax in equal parts
- Choose your colors from either ramekins or tubes
- Drop one color of paint into the water
- Use a toothpick or brush to swirl the paint around in the water as you add different colors
- Carefully dip your paper or fabric into the water
- Remove your object from the water and allow it to dry
Can You Hydro Dip with Acrylic Paint?
Yes, you can use acrylic paint for hydro dipping. However, there are a few things to keep in mind when using acrylic paint for hydro dipping.
First, it is important to ensure that the paint is compatible with the clear coat.
Second, you will need to add a binding agent to the paint to help it adhere to the surface.
Lastly, it is important to cure the paint properly before applying the clear coat.
Does Acrylic Paint Float on Water?
Acrylic paint does not float on water. When acrylic paint is mixed with water, the paint molecules bind to the water molecules, causing the paint to sink.
This is because acrylic chalk paint is denser than water. The only way to make acrylic paint float on water is to add a medium such as glycerin or silicone oil to the paint.
This lowers the density of the paint so that it can float on top of the water.
However, adding a medium will also change the properties of the paint, so it is important to test the floating ability of the paint before using it in hydro dipping projects.
How to Hydro Dip with Acrylic Paint – Dip Painting Techniques
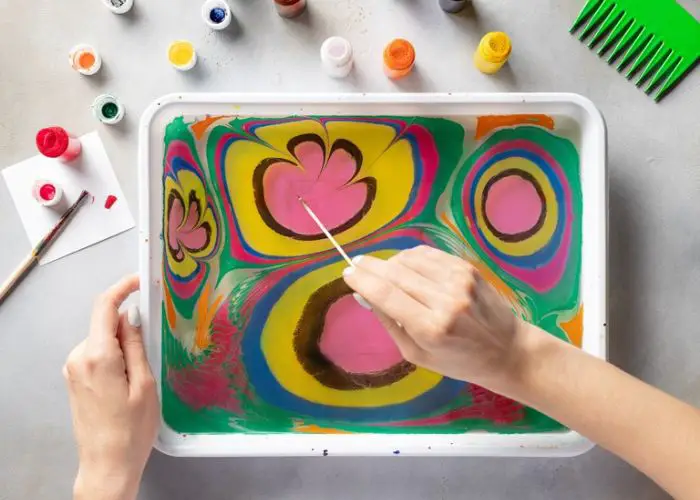
1. Marbling 3D Objects
There are many different ways to create beautiful designs with acrylic paint, and one of the most popular methods is marbling.
This process involves floating different colors of paint on top of each other to create a swirling design.
While this technique is often used on paper, it can also create stunning designs on three-dimensional objects.
Here’s how to marble objects using acrylic paint:
Materials and Supplies
- A bowl of water
- Acrylic paints in various colors
- An object to be dipped (such as a plastic toy)
- Cornstarch
- Toothpick, brush (anything to lay paint on the water and manipulate it)
Instructions:
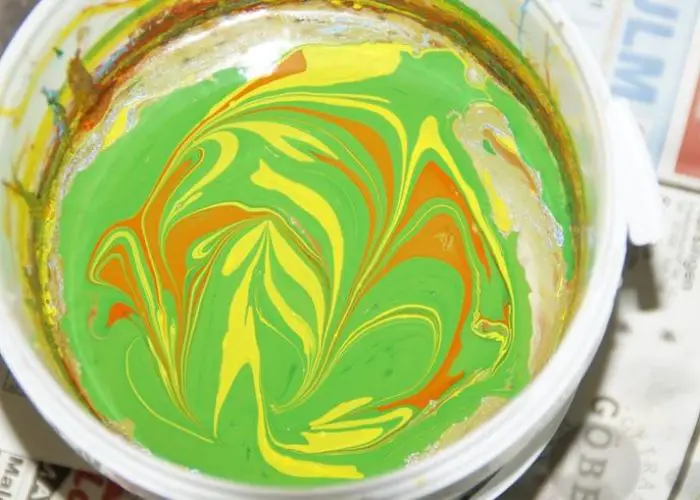
Step one: Pour a small amount of each color of paint into the water bowl.
Note: You can also add food coloring to the water for more vibrant colors.
Step two: To create the marbled design, start by gently dropping one paint color into the water.
Step three: Use a toothpick or brush to swirl the paint around in the water.
Step four: Continue adding different paint colors and swirling them around until you are happy with the design.
Step five: Once satisfied with the design, carefully dip your object into the water.
Step six: Allow the excess paint to drip off of the object.
Step seven: Place the object on a sheet of wax paper or another non-stick surface to dry.
- Tips: If you want to marble multiple objects, have enough paint and water for each object. It’s better to have too much than too little!
- You can also add a drop of dish soap to the water to help the paint spread more easily.
Warning: Do not use water that has been treated with chemicals, as this can cause the paint to react poorly.
2. Paper Marbling
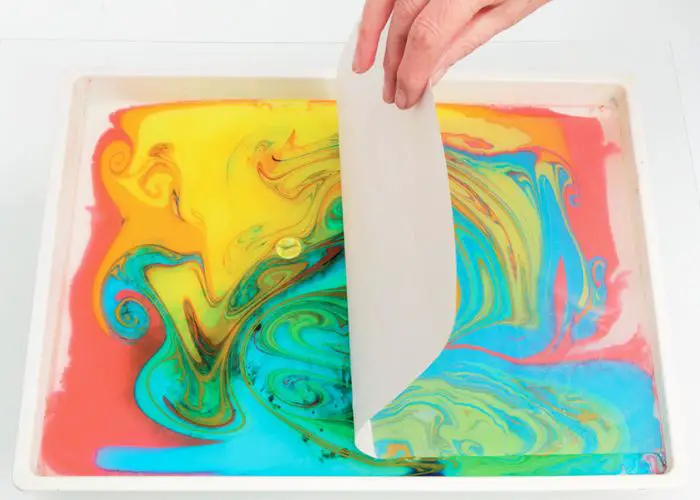
Paper marbling is a printmaking technique that dates back to the 15th century.
It involves floating different colors of paint on top of each other to create a swirling design.
While this technique is often used on paper, it can also create stunning designs on fabric, leather, and other surfaces.
Materials and Supplies:
- A bowl of water
- Acrylic paint in various colors
- A piece of paper or fabric to be dipped
- Paintbrush
- A tray
- Borax
Instructions:
Step one: Mix water and borax or liquid detergent in a 1:3 ratio in the tray.
Step two: Pour a small amount of each color of paint into the water bowl.
Step three: To create the marbled design, start by gently dropping one color of paint into the tray.
Step four: Use a paintbrush to swirl the paint around in the water.
Step five: Continue adding different colors of paint and swirling them around until you are happy with the design.
Step six: Once you are satisfied with the design, carefully dip your paper or fabric into the water.
Step seven: Allow the excess paint to drip off of the paper or fabric.
Step eight: Place the paper or fabric on a sheet of wax paper or another non-stick surface to dry.
Tip: You can also create a marbled design by swiping a paintbrush across the surface of the water.
Warning: Do not use this method with food items.
Alternative Methods of Hydro Dip with Acrylic Paint
There are a few alternative methods of hydro dipping with acrylic paint that you can try.
- The hydrographic film (hydro dipping film) is another option that can be used for hydro dipping. This film is a plastic sheet with a design printed on it. To use this method, you will need to cut out the design that you want to use and place it on the surface of the water. Once the film is in place, you can dip your paper or fabric into the water. But does acrylic stay on fabric? Let’s find out.
- Nail polish method: You can also use nail polish to create a marbled design. To do this, you will need to pour the nail polish into the water. Once the nail polish is in the water, you can dip your paper or fabric into it.
- Enamel paint with borax method: You can also use enamel paint with borax to create a marbled design. To do this, you will need to mix the enamel paint and borax together in a bowl. Once the paint is mixed, you can pour it onto the surface of the water. Once you have dipped your paper or fabric into the water, you can allow it to dry on a sheet of wax paper or another non-stick surface.
- Another method is to pour the paint directly onto the water surface.
Benefits of Hydro Dipping with Acrylic Paint
There are a few benefits of hydro dipping with acrylic paint.
- One benefit is that it is a very versatile method of painting. You can use any color of paint you want, and you can create any design you can imagine.
- Another benefit of hydro dipping with acrylic paint is that it is a very quick and easy way to paint. It only takes a few minutes to set up, and you can have your project completed in no time.
- Finally, hydro dipping with acrylic paint is a great way to add a unique touch to any project.
What Kind Of Paint Can I Use For Hydro Dipping?
You can use any kind of paint that you want for hydro dipping. However, a few types of paint work better than others.
Acrylic paint is a great option because it is water-based and will not damage the surface of your paper or fabric. Another good option is latex paint.
This type of paint is also water-based, and it is very durable. Finally, you can also use enamel paint for hydro dipping.
This type of paint is oil-based, and it is very tough. It is important to note that you should not use oil-based paints on plastics or other non-porous surfaces.
Purpose-Made Hydro Dipping Paints
There are a few companies that make purpose-made hydro dipping paints. These paints are designed to be used with water and will not damage the surface of your paper or fabric.
One brand of purpose-made hydro dipping paint is called Marabu Easy Marble Paint Starter Set. This paint can be found at most hardware stores.
Another good option is Marbling Paint Art Kit. This type of paint is also water-based, and it is very durable.
How to Hydro Dip with Spray Paint
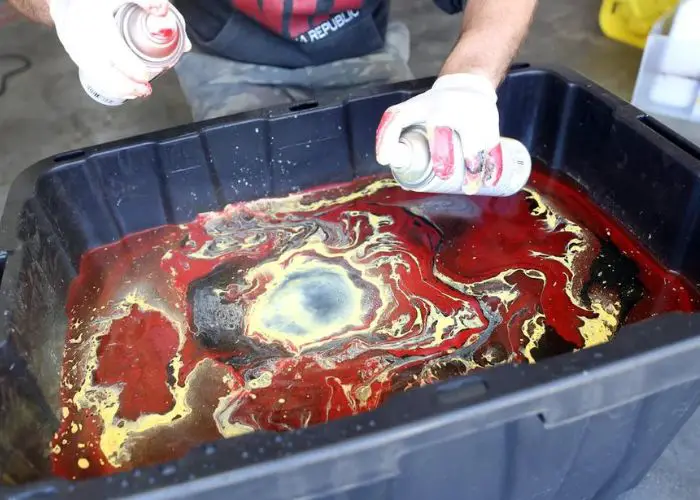
Here is how to hydro dip with acrylic spray paint colors;
You will need:
- A container big enough to fit your object
- Dipping water
- Acrylic paint in the colors of your choice
- A drop cloth or old newspaper
- Masking tape
- Acrylic spray paint
First, take your container and fill it with water. Next, spray your acrylic paint into the water.
The more paint you add, the more opaque your design will be. If you want a marble effect, use three or four colors.
Now take your object and tape it to the drop cloth or old newspaper. Make sure that the entire object is covered so that paint doesn’t get on anything you don’t want it to.
Once your object is taped down, pick it up and hold it over the container of water. Slowly lower it into the water, moving it around so that the paint covers the entire surface.
When you’re happy with the coverage, lift the object out of the water and set it aside to dry. Once it’s dry, you can remove the tape and enjoy your new hydro-dipped design.
Note: You should not spray close to the surface because air bubbles may be formed, which may bring undesired outcomes.
How to Hydro Dip without Spray Paint
You can also hydro dip with no spray paint required. This method is called “paper marbling,” and it’s a lot of fun.
Just follow the steps above under paper marbling to create your new design.
Hydro Dip Tumbler with Acrylic Paint
Tumblers are a great project to hydro dip with acrylic paint. You can use any color of paint to create a design on your tumbler.
You can also add a design to the bottom of the tumbler with acrylic paint.
To hydro dip your tumbler, you will need:
- A cup of water
- A piece of cardboard or paper
- Acrylic paint in your desired colors
- Tumbler
- Tape
- A bowl or container to catch the excess water
First, you will need to tape off the tumbler area that you do not want to be painted.
Next, pour your paint onto the cardboard or paper. Then, dip your tumbler into the paint. Make sure that the entire tumbler is covered in paint.
Next, dip your tumbler into the water. The water will cause the paint to float off of the tumbler and create a design.
Finally, remove your tumbler from the water and allow it to dry.
Another method to create designs in your Tumbler is through sublimation. Read our guide on how to sublimate on acrylic for more insights.
How to Thin Acrylic Paint for Hydro Dipping
There are a few different ways to thin acrylic paint for hydro dipping. One option is to add water to the paint until it reaches the desired consistency.
Another option is to mix the paint with an acrylic medium substitute, such as a pouring medium or flow release agent. These products can be found at most craft stores.
How to Hydro Dip Shoes with Acrylic Paint
It’s easy to paint shoes with acrylic paint and a little bit of water. Hydro dipping is perfect for customizing your sneakers.
Here’s what you’ll need to get started:
- A container of water large enough to dip your shoes in
- A bottle of acrylic paint in the color of your choice
- A piece of cardboard or drop cloth (optional)
To hydro dip, your shoes, start by placing the cardboard or drop cloth on the ground. This will help to protect the surface beneath your work area from paint.
Next, pour the acrylic paint into the container of water and stir gently until the color is evenly distributed.
Next, carefully place your shoes in the water and wait a few minutes for the paint to adhere to the fabric. Do not worry when you err; instead, here’s how to remove acrylic paint from rubber shoes to allow you to make the modifications.
Once the shoes are covered in paint, remove them from the water and allow them to air dry.
FAQs
How do you make acrylic paint float on water?
To make acrylic paint float on water, you will need to add a wetting agent to the paint. Wetting agents are available at most craft stores. Simply add a few drops of the wetting agent to the paint and stir until it is evenly distributed.
Can you Hydro dip with paint?
Yes, you can hydro dip with paint. However, you will need to thin the paint to be consistent with water. You can do this by adding water or an acrylic medium to the paint. The best option is to use hydro dip paint.
Can you Hydro dip without primer?
No, you will need to use a primer before you hydro dip. The primer will help the paint adhere to the object’s surface.
How do you Hydro dip with acrylic paint without borax?
Borax is not necessary to hydro dip with acrylic paint. However, it can help to thin the paint so that it is the consistency of water. You can also use an acrylic medium or flow release agent to thin the paint.
Conclusion
Acrylic paint is a great medium for hydro dipping because it is easy to thin and covers the object in color.
You can use any type of acrylic paint for hydro dipping, but it is important to make sure that the paint is thin enough so that it will float on the water.
In this article, we have provided tips on how to thin acrylic paint for hydro dipping.
We have also answered some frequently asked questions about hydro dipping with acrylic paint.
Thanks for reading!


Leave a Reply