Unleash your inner artist and illuminate your canvas with vibrant neon hues.
Discover the electrifying world of creating neon colors using acrylic paint, perfect for capturing the energy of urban nightlife or adding a playful twist to your artwork.
With our simple and captivating guide, you’ll learn the secrets to mixing acrylics for that mesmerizing glow.
Say goodbye to dull palettes and let your creativity shine as bright as a neon sign. Ready to light up your artistic journey?
Join us as we explore the dazzling realm of neon acrylics and transform your masterpieces into eye-catching, luminous wonders.
How to Make Neon Colors With Acrylic Paint
The most common way to make neon colors with acrylic paint is to mix the paint with neon pigment powders. For example, to make neon green, add neon pigment powder to green acrylic paint and experiment with different amounts until the desired brightness is achieved.
Understanding Color Theory
Before diving into the world of neon acrylics, it’s essential to grasp the fundamentals of color theory.
A solid understanding of primary, secondary, and tertiary colors, the color wheel, and the principles of color mixing will enable you to create stunning, vibrant neon shades.
Primary, secondary, and tertiary colors
The foundation of color theory starts with three primary colors: red, blue, and yellow. These colors cannot be created by mixing other colors, making them the building blocks for all other hues.
When primary colors are combined in equal parts, they produce secondary colors: green, orange, and purple.
Mixing a primary color with its adjacent secondary color results in tertiary colors, which include red-orange, yellow-orange, yellow-green, blue-green, blue-purple, and red-purple.
Color wheel and color mixing
The color wheel is a valuable tool for understanding the relationships between colors. It provides a visual representation of how colors are related to one another, making it easier to mix and match them effectively.
On the color wheel, primary colors are evenly spaced apart, with secondary and tertiary colors filling the spaces between them.
Mixing colors on the color wheel can be approached systematically. For example, to create a particular shade, start by combining the two primary colors closest to the desired hue.
Then, adjust the mixture by adding more of one color or the other until the desired shade is achieved. Remember, the intensity and vibrancy of colors can be further adjusted by adding white or black.
Complementary and analogous colors
Complementary colors are those that are opposite each other on the color wheel, such as red and green, blue and orange, or yellow and purple color.
When used together, they create a high contrast, making them an excellent choice for adding visual interest to your artwork.
Analogous colors, on the other hand, are located next to each other on the color wheel, such as red, orange, and yellow, or blue, green, and purple. These colors naturally blend well together and create a harmonious color scheme.
When working with neon colors, understanding complementary and analogous relationships can help you create striking color combinations that both contrast and complement your vibrant hues.
Can You Mix Neon Colors Yourself?
Creating neon colors with regular acrylic paints can be a daunting task due to their distinct fluorescent properties.
While it is possible to mix bright colors that resemble neon shades, they might not possess the same vibrant glow found in true neon pigments.
For optimal results, I recommend you use specialized neon or fluorescent paints to achieve the desired intensity and luminosity.
However, experimenting with color mixing and different techniques that I’ve discussed below may still yield some visually appealing and eye-catching hues, even if they don’t exactly replicate the glow of authentic neon colors.
Choosing the Right Acrylic Paints
Types of acrylic paints
Selecting the right acrylic paints is crucial for achieving vivid neon colors. Acrylic paints come in various forms, such as heavy body, soft body, and fluid acrylics.
Heavy body acrylics have a thick consistency, making them suitable for textured and impasto techniques.
Soft body acrylics are more fluid and versatile, ideal for a wide range of applications, including flat washes and detailing.
Fluid acrylics have a thinner consistency, perfect for smooth coverage, glazing, and watercolor-like effects.
Pigment quality and opacity
The quality and opacity of pigments play a significant role in producing vibrant neon colors. High-quality pigments tend to be more saturated, providing better coverage and color intensity.
When choosing acrylic paints, opt for those with good lightfastness ratings to ensure the longevity of your neon colors.
Transparent or semi-transparent colors might not deliver the desired neon effect; thus, selecting opaque or semi-opaque paints is advisable for more vivid results.
Recommended brands for neon colors
Several acrylic paint brands offer neon or fluorescent paint colors that deliver the desired intensity and vibrancy. Some popular options include:
Golden Heavy Body Acrylics – Known for their excellent pigment quality, Golden offers a range of fluorescent colors perfect for creating neon effects.
Liquitex Professional Soft Body Acrylics – Liquitex provides a variety of neon colors in their soft body line, which allows for smooth and consistent application.
Amsterdam Standard Series Acrylics – This brand offers an affordable yet high-quality range of neon colors that are suitable for artists of all levels.
How to Make Neon Colors With Acrylic Paint – 3 Methods
I am always amazed at the range of vibrant colors that can be achieved by combining acrylic paints.
When it comes to creating neon effects, understanding how to properly mix and use pigments is essential in order to achieve the desired intensity and luminosity.
I have found that, while it can be difficult to mix bright fluorescent shades with regular acrylic paints, using the right colors and techniques can still yield some visually striking hues.
1. Mixing Neons With Neon Pigment Powder
What You’ll Need:
- Neon pigment powder
- Acrylic medium (gloss or matte)
- Mixing palette or container
- Palette knife or spatula
- Gloves (optional)
Step-by-step instructions:
Step 1: Prepare your workspace
Make sure you have a clean and organized workspace with all the necessary materials within reach. Cover your work surface with a protective sheet or paper to prevent staining.
Step 2: Put on gloves
Wearing gloves will protect your hands from direct contact with the pigment powder and make cleanup easier.
Step 3: Measure out the neon pigment powder
Using a small spoon or scoop, place a small amount of neon pigment powder onto your mixing palette or container.
Start with a conservative amount, as you can always add more pigment later to intensify the color.
Step 4: Add acrylic medium
Slowly add your chosen acrylic medium (gloss or matte) to the pigment powder.
Begin with a small amount, approximately equal to the amount of pigment, to ensure the mixture does not become too diluted.
Step 5: Mix pigment and medium
Use a palette knife or spatula to thoroughly combine the pigment powder and acrylic medium. Mix until you achieve a smooth, even consistency, free of lumps or dry pigment.
Step 6: Adjust color and consistency
If necessary, add more pigment powder to intensify the color or more medium to lighten the shade. Mix well after each addition to ensure the color is uniform.
Step 7: Test the paint
Before using your custom neon paint, test a small swatch on a piece of paper or canvas to ensure the color and consistency meet your expectations.
Advantages of Using Neon Pigment Powder:
- Customizable colors and intensity: Mixing your pigments allows you to create a wide range of neon shades and control their vibrancy.
- Cost-effective: Purchasing pigment powder can be more cost-effective than buying premixed neon acrylic paints, especially if you plan to create a variety of colors.
- Extended shelf life: Pigment powders typically have a longer shelf life than premixed paints, making them a practical choice for artists who work with neon colors less frequently.
Disadvantages of Using Neon Pigment Powder:
- Time-consuming: Mixing neon pigments with acrylic medium can be a time-consuming process compared to using premixed paints.
- Inconsistent results: Achieving consistent results when mixing your own neon colors can be challenging, especially for beginners.
- Potential mess: Working with pigment powders can be messy, and precautions should be taken to avoid spills and stains.
2. Making Neon Colors With Acrylic Gesso
Acrylic gesso is traditionally used as a base layer on a canvas or other painting surface to create a consistent, smooth texture before applying paint.
However, you can also use gesso to create neon colors by tinting it with neon acrylic paint.
Here’s a step-by-step guide on how to make neon colors using acrylic gesso:
What You’ll Need:
- White acrylic gesso
- Neon acrylic paint
- Mixing palette or container
- Palette knife or spatula
- Gloves (optional)
Step-by-step instructions:
Step 1: Prepare your workspace
First, make sure you have a clean and organized workspace with all the necessary materials within reach. Cover your work surface with a protective sheet or paper to prevent staining.
Step 2: Put on gloves (optional)
I recommend wearing gloves to keep your hands clean while handling the gesso and neon paint.
Step 3: Measure out the acrylic gesso
Scoop a generous amount of white acrylic gesso onto your mixing palette or container.
Step 4: Add neon acrylic paint
Squeeze a small amount of neon acrylic paint into the gesso. Start with a conservative amount, as you can always add more paint to achieve the desired intensity.
Step 5: Mix gesso and paint
Use a palette knife or spatula to mix the neon paint and gesso thoroughly, ensuring a smooth and consistent texture. Continue mixing until the gesso is evenly tinted with the neon color.
Step 6: Adjust color intensity
If necessary, add more neon paint to achieve the desired color intensity. Mix well after each addition to ensure the color is evenly distributed.
Step 7: Test the paint
Before using your custom neon gesso, test a small swatch on a piece of paper or canvas to ensure the color and consistency meet your expectations.
3. Creating Neon Colors by Mixing Paint
Although mixing true neon colors with standard acrylic paints can be challenging, I’ve found that you can still create bright and vivid shades that resemble neon hues.
Here’s a step-by-step guide on how to create neon-like colors by mixing paint:
What You’ll Need:
- Primary acrylic paints (cyan, magenta, and yellow)
- White acrylic paint
- Mixing palette or container
- Palette knife or spatula
- Gloves (optional)
Step-by-step instructions:
Step 1: Prepare your workspace
First, I ensure a clean and organized workspace with all the necessary materials within reach. I also cover my work surface with a protective sheet or paper to prevent staining.
Step 2: Put on gloves (optional)
I recommend wearing gloves to keep your hands clean while handling the paint.
Step 3: Mix bright base colors
I start by mixing the brightest possible shades of primary and secondary colors using cyan, magenta, and yellow paints.
For example, I mix equal parts of cyan and magenta for a vivid purple or equal parts of cyan and yellow for a bright green. I avoid adding black, as it can dull the colors.
Step 4: Add white paint
To achieve a neon-like effect, I gradually add small amounts of white paint to the bright acrylic paint. The white paint will lighten the shade and enhance its perceived brightness.
Step 5: Adjust color intensity
I continue adding white paint in small increments, mixing thoroughly each time until I achieve the desired brightness and intensity.
I keep in mind that adding too much white paint can result in a pastel color mix, so I add it carefully.
Step 6: Test the paint
Before using my custom neon-like paint, I test a small swatch on a piece of paper or canvas to ensure the color meets my expectations.
Creating Specific Neon Colors
In this section, I will share how I create specific neon colors using acrylic paints. Keep in mind that while these colors may not be as fluorescent as true neon pigments, they can still be vibrant and eye-catching.
Neon pink
To create a neon pink color, I start with a bright magenta paint and add a small amount of white paint to lighten the shade.
Mixing in a touch of yellow can also enhance the vibrancy of the color. I continue to adjust the ratio of magenta, white, and yellow until I achieve the desired neon pink hue.
Neon green
To make a neon green, I mix equal parts of cyan and yellow paint to create a bright green. Cyan color mixing is done with blue and green pigments. To mix yellow, I use a combination of red and yellow paint. Then, I add a small amount of white paint to lighten the color and enhance its brightness.
Adjusting the ratio of cyan, yellow, and white allows me to achieve the desired neon green shade.
Neon orange
For neon orange, I combine equal parts of yellow and magenta paint to create a vivid orange.
I then add a small amount of white paint to brighten the color. Adjusting the ratio of yellow, magenta, and white helps me achieve the perfect neon orange hue.
Avoid using black in neon colors, as combining orange and black makes a significantly darker shade that contradicts neon hues’ vibrant and bright nature.
Neon blue
Creating neon blue paint involves starting with a bright cyan paint and gradually adding white paint to lighten the shade.
Adjusting the ratio of cyan and white paint allows me to achieve the desired neon blue color.
Neon yellow
For neon yellow, I use a bright yellow acrylic paint and mix in a small amount of white paint to enhance its brightness.
Adjusting the ratio of yellow and white paint helps me achieve the desired neon yellow shade.
Neon purple
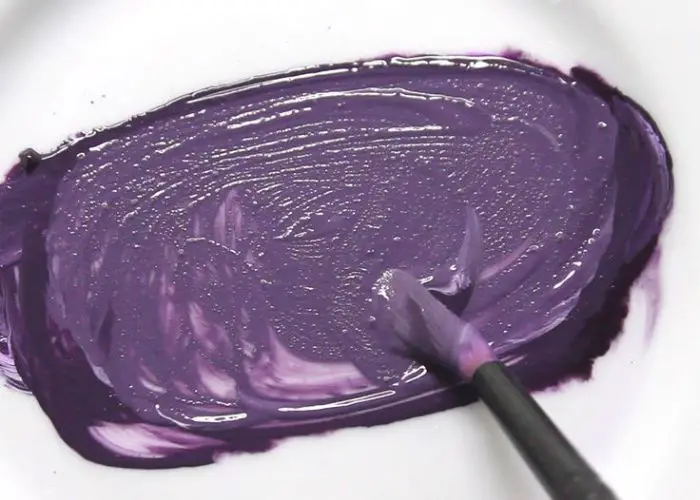
To make neon purple, I mix equal parts of cyan and magenta paint to create a vivid purple.
Then, I add a small amount of white paint to lighten the color and enhance its brightness. Adjusting the ratio of cyan, magenta, and white allows me to achieve the perfect neon purple hue.
Best Neon Colors With A Glow-In-The-Dark Effect
Achieving the perfect glow-in-the-dark effect has taken my neon artwork to a whole new level. Here are some of the top products I recommend for creating neon colors with glow-in-the-dark properties:
PEBEO Phosphorescent Gel
I’ve found that PEBEO Phosphorescent Gel is a fantastic water-based product that can be mixed with acrylic paints or applied directly onto the painting surface.
It absorbs and stores light, then releases it as a glow when placed in darkness. I’ve used the gel with various colors to create stunning glow-in-the-dark effects.
FolkArt Neon Glow Acrylic Paint Set
The FolkArt Neon Glow Acrylic Paint Set is another product I’ve had great success with. This neon acrylic paint set includes six vibrant neon colors with glow-in-the-dark properties.
These neon paints can be used on their own or mixed with other acrylics to create luminous, eye-catching artwork.
Neon Nights UV Fabric Paint Set
Lastly, I recommend the Neon Nights UV Fabric Paint Set for those looking to create neon art on fabric. This set includes eight vivid neon colors that react to UV light, creating a glowing effect.
Although designed for fabric, I’ve found that these paints work well on various surfaces, such as canvas, wood, and paper. The good this is that this brilliant acrylic paint dries to a smooth vibrant finish.
Painting Techniques for Neon Art
In my experience, experimenting with various painting techniques can help enhance the vibrancy and visual impact of neon artwork.
Here are some techniques I’ve found particularly effective when working with neon colors:
Layering and glazing
Layering and glazing are techniques that involve building up thin, transparent layers of paint to create depth and luminosity.
I’ve found that applying multiple layers of neon paint, allowing each layer to dry before adding the next, can create a rich and vibrant effect.
Glazing, which involves applying a thin, transparent layer of color over a dry layer of paint, can also help enhance the overall vibrancy of neon colors.
Related Read: How To Make Acrylic Paint Transparent
Dry brushing
Dry brushing is a technique where I apply paint to the brush, remove most of the paint, and then lightly brush it over the surface.
This technique can create interesting textures and highlights in my neon artwork, adding visual interest and depth to the piece.
Impasto
Impasto is a technique that involves applying thick layers of paint to create texture and dimension on the canvas.
I’ve found that using a palette knife or a stiff brush to apply thick layers of neon paint can create bold and dramatic effects.
The added texture can catch light in interesting ways, enhancing the overall impact of the neon colors.
Sgraffito
Sgraffito is a technique where I scratch or scrape away layers of wet paint to reveal the underlying color or surface.
This technique can be used to create intricate patterns, lines, and textures in neon artwork, adding an extra layer of visual interest.
By using a variety of tools, such as a palette knife, a toothpick, or even the end of a paintbrush, I can achieve a wide range of effects with sgraffito.
How to Keep Neon Acrylic Colors Bright
Maintaining the brightness and vibrancy of neon acrylic colors is crucial for achieving the desired visual impact in artwork.
Here are some tips and techniques that can help in keeping neon acrylic colors bright:
Use high-quality paints
Opting for high-quality acrylic paints with a high pigment concentration can significantly enhance the brightness and longevity of neon colors.
Some reputable brands that are recommended for neon acrylic paints include Golden, Liquitex, and Amsterdam.
Prime your surface
Priming the canvas or surface with a white gesso or primer before painting can create a smooth, even surface that allows the neon colors to appear brighter and more vibrant.
Paint on a white or light-colored background
Neon colors tend to look brighter and more vivid when applied over a white or light-colored background. Using a white or light-colored underpainting can enhance the vibrancy of neon colors.
Apply multiple layers
Applying multiple layers of neon paint can help build up the color’s intensity and brightness.
It’s important to let each layer dry before applying the next to avoid creating muddy colors and maintain the desired vibrancy.
Protect your artwork with varnish
After completing the neon painting and allowing it to fully dry, applying a varnish can help protect the colors and prevent fading.
Choosing a UV-protective varnish is especially crucial as it helps shield the colors from ultraviolet light, which can cause fading over time.
Store and display your artwork properly
To keep neon artwork looking bright and vibrant, it’s important to store and display it in a location that is not exposed to direct sunlight or harsh artificial light.
Prolonged exposure to light can cause the colors to fade, so choosing the right environment is essential in maintaining the brightness of neon colors.
Tips for Painting with Neon Acrylics
- Use a white base coat: Applying a white base coat to the canvas or surface before painting with neon acrylics can help to enhance the brightness and vibrancy of the colors. The white background acts as a reflective surface, allowing the neon colors to appear even more vibrant.
- Avoid over-mixing: Over-mixing the neon acrylic colors can cause the pigment to break down and result in a dull or muddy appearance. To prevent this, it’s important to mix the colors only as much as necessary and to avoid mixing for too long.
- Experiment with layering and blending: Layering and blending neon acrylic colors can create unique and interesting effects. Try experimenting with different layering techniques and blending the colors to create depth and dimension in your artwork.
- Use a UV light to check for color accuracy: Neon acrylic colors can appear different under different lighting conditions. To ensure color accuracy, try using a UV light to check the colors under UV light conditions. This can help to ensure that the colors appear as intended in various lighting environments.
- Add a glossy finish: Applying a glossy varnish or finish to the neon acrylic painting can help to enhance the colors and create a polished, professional look. The glossy finish can also help to protect the colors from fading or discoloration over time.
Related posts:
- How to make a cream color with paint
- How to make tan color with paint.
- How to make olive color paint
FAQs
Can you make neon colors with acrylic paint?
Yes, you can make neon colors with brilliant acrylic paint. Neon colors are created by adding fluorescent pigments to the paint, which give them a bright and vibrant hue.
What colors make neon colors?
Neon colors are often achieved by incorporating fluorescent pigments into a base color. For instance, pink and green shades can be created by infusing fluorescent magenta pigment into white paint for neon pink and adding fluorescent yellow pigment to green paint for neon green.
What two colors make neon?
Neon colors are not created by mixing two colors together. Instead, they are made by adding fluorescent pigments to a base color. The pigments absorb and emit light in a unique way, giving the colors a bright and vivid appearance.
Conclusion
Making neon colors with acrylic paint is a fun and creative way to add a bright and vibrant touch to any artwork.
There are several methods for achieving neon colors, including using neon pigment powder, acrylic gesso, and mixing paint.
Additionally, incorporating fluorescent paints and glow-in-the-dark effects can further enhance the visual impact of neon art.
It’s important to choose high-quality paints, prime the surface, and apply multiple layers to achieve the desired vibrancy and longevity of the neon colors.
With the right tools, techniques, and a little experimentation, artists can create stunning works of art with eye-catching neon colors. So don’t be afraid to let your creativity shine with neon acrylic paints.


Leave a Reply