Applying the acrylic powder and liquid and creating a set of beautiful acrylic nails is no easy task. It can also be difficult to know how long you should soak nails in acetone.
As pro beauticians, nail professionals, models, and make-up artists this is one knowledge gap that needs filling. While using acetone, you should ensure your nails remain safe.
So, in this blog post, I’ll discuss the importance of understanding the right amount of time needed for soaking your nails.
Join me as I explore why soaking times vary and review step-by-step instructions on how long you should soak your nails according to different scenarios.
How Long Should You Soak Acrylic Nails in Acetone
The ideal duration for soaking acrylic nails in acetone is around 30 to 40 minutes. This time frame allows the acetone to penetrate the layers of the acrylic, making it easier to remove without damaging your natural nails.
Understanding Acrylic Nails and Acetone
Acrylic nails are artificial nail enhancements that you can use to create longer, stronger, and more beautiful nails. They consist of a combination of liquid monomer and powdered polymer.
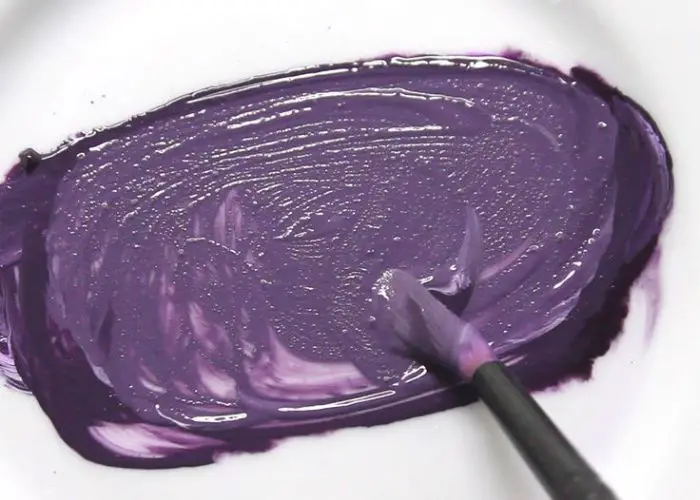
To make acrylic nail polish, mix the two to form a thick paste that you can apply to the natural nails or nail tips.
But what’s the difference between tips and acrylics? Find out in our other blog.
You can also decorate your nails with acrylic paint if you do not have nail polish.
The paste hardens when exposed to air, creating a durable and long-lasting nail extension.
Yet, there may come a time when you need to remove your acrylic nails. Either because the nail growth after acrylics has become noticeable or you want to give your natural nails a break.
This is where acetone comes into play. Acetone is a solvent used in the beauty industry for various purposes.
These include removing nail enhancements like acrylic nails, nail polish, and gel polish.
Recommended read: Acrylic nails vs hard gel nails.
Acetone works by breaking down the bonds between the acrylic and the natural nails, allowing for easier removal.
When you soak your acrylic nails in acetone, the acetone penetrates the layers of the acrylic, causing it to soften and become more pliable.
This makes it easier to scrape off the acrylic without causing damage to the underlying natural nails.
Soaking acrylic nails in acetone for around 30 to 40 minutes. This time frame is enough for the acetone to penetrate the layers of the acrylic.
Be patient during this process and avoid pulling or prying off the acrylic, as this can lead to nail damage.
To protect your skin during the soaking process, apply a thin layer of petroleum jelly around your nails. This acts as a barrier and helps prevent excessive drying or irritation from the acetone.
After the soaking process, moisturize your hands and nails. Acetone can be drying, so applying a nourishing cuticle oil or hand cream can help restore moisture and keep your nails healthy.
Read also: Why do acrylic nails speed up nail growth?
Can You Remove Acrylic Nails at Home?
Yes, you can remove acrylic nails at home but it is not recommended. Acrylic nails can be tricky to remove and if done improperly, it can damage your natural nail bed or cause infection.
It is best to go to a professional who has experience with removing acrylic nails for this job. They have the right tools and know-how to safely and effectively remove the acrylic nails.
If you are determined to remove your acrylic nails at home, make sure to follow the proper steps and precautions to avoid any issues.
Read also: How to hide a missing fingernail?
Importance of Proper Nail Removal to Maintain Nail Health
Proper nail removal is crucial for maintaining nail health and preventing damage to your natural nails.
It may be tempting to take shortcuts or use harsh methods to remove nail enhancements.
But please, prioritize the health of your nails and follow the correct procedures. Here are some reasons why proper nail removal is important:
Minimizes nail damage
Improper nail removal techniques or nail enhancements cause damage to your natural nails. This damage may include thinning, weakening, peeling, or even nail breakage.
Prevents nail infections
Improper nail removal can create opportunities for bacterial or fungal infections to develop. When you remove nail enhancements using force, you may get small tears or injuries in the real nail bed.
The tears will provide a pathway for harmful microorganisms to enter. These infections can cause pain, swelling, discoloration, and even more severe complications.
Preserves nail integrity
Your natural nails are living structures. Inappropriate removal methods can disrupt the delicate balance and integrity of the nail plate.
For instance, forcefully removing acrylic nails can result in the removal of the top layer or layers of the natural nail. Proper nail removal allows your natural nails to grow strong and flexible.
Facilitates healthy nail growth
Allowing your natural nails to grow and regenerate well is essential for long-term nail health.
Remove nail enhancements correctly and give your nails the opportunity to grow back strong and healthy. Poor removal methods can hinder nail growth.
How to Remove Acrylic Nails at Home With Acetone Without Destroying Your Natural Nails
Below are methods you can use to remove acrylic nails safely when at home:
Method 1: Soaking
Step 1: File your acrylics
Use a coarse nail file to file down the surface of your acrylic nails. This helps break the seal and thin out the acrylic, making the removal process easier.
Step 2: Apply oil for extra protection
Apply a thin layer of petroleum jelly or cuticle oil around the edges of your nails to prevent excessive drying.
This also acts as a barrier, preventing the acetone from directly contacting your skin.
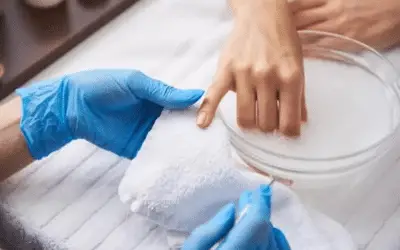
Step 3: Soak your hands in acetone solution
Fill a bowl or container with enough acetone and submerge your fingertips. You can also use an acetone-soaked cotton ball placed on each nail if you prefer.
Immerse your nails in the acetone solution and let them soak for approximately 30 to 40 minutes.
You can cover the bowl with a towel or use finger caps to retain heat and enhance the effectiveness of the acetone.
Step 4: Gently remove acrylics
After the soaking time, the acrylic nails should have softened. Use a wooden cuticle pusher or a soft manicure stick to gently scrape off the softened acrylic from your natural nails.
Avoid using excessive force or prying, as this can cause damage to your nails. If there are stubborn areas, repeat the soaking process for a few more minutes and try again.
Step 5: Apply cuticle oil
Once you have removed all the acrylic, wash your hands with mild soap and water to remove any acetone residue. Pat your nails dry and apply a generous amount of cuticle oil or a nourishing hand cream.
Massage the oil or cream into your nails and cuticles to restore moisture and promote nail health.
Method 2: Foil soaking method
Using the foil soaking method is another effective technique that can help protect your natural nails. Here’s a step-by-step guide:
Step 1: File your acrylic nails
Begin by using a glass nail file to gently file down the surface of your acrylic nails. This step helps break the seal and allows the acetone to penetrate the acrylic more effectively.
Step 2: Soak cotton balls in acetone solution
Take cotton balls and saturate them with an acetone solution. You can pour acetone into a small bowl and place the cotton balls inside.
Ensure they are completely soaked but not dripping.
Step 3: Wrap foil over acrylic nails
Tear aluminum foil into small square pieces, large enough to cover each nail. Take a cotton ball soaked in acetone and place it on top of an acrylic nail.
Wrap the foil tightly around the cotton ball, securing it in place. Repeat this process for each nail.
Step 4: Allow the foils to dissolve the acrylic
Let the foils and soaked cotton balls sit on your nails for approximately 20 to 30 minutes. This allows the acetone to work on dissolving the acrylic nails.
Step 5: Remove the foils and wipe off acrylic
After the recommended time has passed, remove the foils from your nails. The acrylic should have softened, making it easier to remove.
Use a wooden cuticle stick or a soft manicure stick to scrape off the softened acrylic from your natural nails.
Step 6: Wash off and apply cuticle oil
Once all the acrylic has come off, wash your hands with mild soap and water to remove any acetone residue.
Dry your nails and apply a generous amount of cuticle oil or a nourishing hand cream.
Method 3: Soak and scrape
Step 1: File your nails. File down the surface of your acrylic nails. This step helps to break the seal and reduce the thickness of the acrylic, making the removal process easier.
Step 2: Soak your hands in acetone. Prepare a bowl or basin filled with enough acetone to fully submerge your fingertips.
Place your hands in the acetone solution and let them soak for approximately 15-20 minutes. Ensure that all of your acrylic nails are submerged in the acetone.
Step 3: Scrape off excess acrylic. After soaking, you’ll notice that the acrylic has become softer and more pliable. Scrape off the softened acrylic from your natural nails.
Do not apply excessive force or damage your natural nails in the process. Repeat the soaking step for a few more minutes to further soften the acrylic.
Step 4: Apply cuticle oil. Once you have removed the acrylic, wash your hands with mild soap and water to remove any acetone residue.
Pat your nails dry and apply a generous amount of cuticle oil or a moisturizing hand cream. Massage the oil or cream into your nails and cuticles to hydrate and nourish them.
How Long Does Acetone Take to Remove Acrylic Nails?
Acetone takes about 20-30 minutes to remove acrylic nails fast depending on the type of adhesive used for application.
An acetone soak will start to break down the bond between the acrylic and your natural nail after about 10-15 minutes. If you are using an acetone-free remover, it can take up to 40 minutes for removal.
Regardless of which method you use, be patient and do not try to rush the process as this can damage your nails. After removal, make sure you moisturize and condition yourself right away.
This will help ensure that they stay healthy and strong. Taking care of your nails after acrylic removal is just as important as the removal itself.
Factors Influencing Soaking Time
The soaking time required to remove acrylic nails is influenced by several factors. Here are some key factors that can affect the soaking time:
Nail thickness and length
Thicker or longer acrylic nails may require more soaking time to soften and dissolve. The thickness and length of the acrylic layer can impact how the acetone penetrates and breaks down the acrylic.
Type of acrylic product used
Different types of acrylic products have varying compositions and formulas. This affects their response to acetone.
Some acrylic products may be more resistant and require a longer soaking time, while others may dissolve more quickly.
Quality and strength of the acrylic application
The skill and technique used during the acrylic application can influence its strength and adhesion.
A well-applied and strong acrylic layer may take longer to dissolve compared to a less durable application.
Personal preferences and comfort levels
Personal preferences and comfort levels also play a role in determining the soaking time. Some individuals may prefer to soak their nails for a longer duration to ensure long acrylic removal at salon.
Others may opt for a shorter soaking time to minimize the exposure to acetone.
How To Remove Acrylic Nails Without Acetone
Removing acrylic nails without acetone can be a bit more challenging, but it is possible. Here are some of the effective methods to use if you do not want to use acetone.
Method 1: Using acetone-free nail polish remover
You’ll need the following tools:
- Coarse nail file
- Buffer
- A cuticle pusher or orangewood stick,
- Cotton pads or balls
- Acetone-free nail polish remover
- Aluminum foil
- Nail clipper
Start by using a coarse nail file to file down the surface of your acrylic nails. This helps break the seal and reduces the thickness of the acrylic, making the removal process easier.
Use a buffer to buff the surface of the acrylic nails. This helps to remove the shine and roughen the surface, allowing the nail polish remover to penetrate better.
Take cotton pads or balls and soak them in acetone-free nail polish remover. Make sure they are saturated but not dripping.
Place the soaked cotton pads onto each acrylic nail. Ensure that the entire surface is covered.
Wrap a small piece of aluminum foil around each nail to hold the soaked cotton pad in place. Press to secure the foil.
Let your nails soak in the acetone-free nail polish remover for approximately 20-30 minutes. This gives the product time to penetrate and soften the acrylic.
After the soaking time, remove the foil wraps and cotton pads from your nails.
Use a cuticle pusher or an orange stick to scrape off the softened acrylic from your natural nails. Be careful not to apply too much force or damage your natural nails.
Once all the acrylic has been removed, wash your hands with mild soap and water to remove any acrylic residue.
Apply nourishing cuticle oil or moisturizing hand cream to replenish moisture and keep your nails healthy.
Method 2: With an electric nail file/nail bit
Using an electric nail file or nail drill requires skill and caution. If you’re not familiar with using these tools, seek professional assistance from a nail salon technician.
For this process, you will need the following items:
- Electric nail file or a nail drill with a suitable nail bit (such as a carbide bit or a sanding band)
- Nail buffer and nail clippers
- A cuticle pusher or orangewood stick
- Dust brush or a towel
Use the electric nail file or nail drill with a gentle speed setting to file down the surface of your acrylic nails. Be cautious and gentle to avoid damaging your natural nails.
Aim to file off as much of the acrylic as possible without touching your natural nails.
Use the electric nail file or drill to thin out the remaining acrylic on your nails. Do not file too much or go too close to your natural nails.
Use a nail buffer to remove any remaining acrylic and smoothen the nail surface.
Use a cuticle pusher or an orangewood stick to push back your cuticles. This step helps expose any remaining acrylic near the cuticle area for easier removal.
With the electric nail file or drill, continue filing and buffing the acrylic, paying attention to the edges and cuticle area. Work your way until you remove all the acrylic.
Use a dust brush or a towel to remove any dust or debris from the filing process. Wash your hands with mild soap and water to cleanse your nails.
Read also: How to clean under fake nails.
Method 3: Using nail filers
To use a nail filer, follow the following steps:
- Use a coarse nail file to file down the surface of your acrylic nails.
- Switch to a medium-grit nail file and continue filing the surface of the acrylic nails, shaping them as desired. Pay attention to thinning out the acrylic, focusing on the tips and edges.
- Use a fine-grit nail file to smooth out the surface of the acrylic nails.
- Use a cuticle pusher or an orangewood stick to gently push back your cuticles. This helps expose any remaining acrylic near the cuticle area for easier removal.
- Use the coarse nail file or a buffer to continue filing and buffing the acrylic, paying attention to the edges and cuticle area. Work your way until you remove all the acrylic.
- Use a dust brush or a towel to remove any dust or debris from the filing process.
Method 4: Using hot water
Can hot water remove acrylic nails? Certainly yes.
Well, while using hot water alone may not effectively remove acrylic nails, it can help in softening the acrylic, making it easier to remove.
Step 1: Fill a basin or bowl with hot water. Make sure the water is comfortably hot but not scalding.
Step 2: File down the surface of your acrylic nails. This step helps to break the seal and reduce the thickness of the acrylic.
Step 3: Submerge your fingertips in the warm water, ensuring that the acrylic nails are fully immersed.
Step 4: Allow your nails to soak for about 20-30 minutes. The hot water will help soften the acrylic, making it easier to remove.
Step 5: After soaking, test the softness of the acrylic by pressing gently. If the acrylic feels soft and pliable, it’s ready for removal. If not, continue soaking for a few more minutes.
Step 6: Once the acrylic is softened, gently lift and pry off the acrylic nails from your natural nails. Be careful not to apply excessive force or damage your natural nails in the process.
Step 8: After removing the acrylic, wash your hands with mild soap and water to remove any residue.
Method 5: Using dental floss
Using dental floss can be a helpful technique for removing acrylic nails. Here’s a step-by-step guide:
1. Start by using a cuticle pusher to pry and lift the edges of the acrylic nails. Do not apply excessive force or damage your natural nails.
2. Take a piece of dental floss and slide it under the lifted edge of the acrylic nail. You can use a back-and-forth sawing motion or a gentle rocking motion.
3. Once you have positioned the dental floss under the acrylic nail, hold both ends of the floss and pull it slowly and steadily. This should help separate the acrylic from your natural nail bed.
4. Once you have removed the acrylic nails, use a file to smooth down any remaining acrylic or rough edges. Then, use a buffer to refine the surface of your natural nails.
Method 6: Using a laminated business card
Using a laminated business card is another creative method for removing acrylic nails. Here’s a step-by-step guide:
1. Gently pry and lift the edges of the acrylic nails. Be careful not to apply too much force or damage your natural nails.
2. Take the laminated business card or sturdy card and insert it under the lifted edge of the acrylic nail. Make sure to position it parallel to your natural nail bed.
3. Once the card is in place, slide it back and forth or wiggle it from side to side. This motion helps separate the acrylic from your natural nail.
4. Move the card along the edges of the acrylic nail. Repeat the sliding and wiggling motion to loosen the acrylic.
After successfully removing the acrylic nails, use a file to smooth down any remaining acrylic or rough edges. Then, use a buffer to refine the surface of your natural nails.
Important Tips And Precautions To Follow While Removing Acrylic Nails
When removing acrylic nails, follow the following precautions to ensure a safe and effective process.
1. Stay patient throughout the process and avoid rushing, as this can increase the risk of damaging your natural nails.
2. Apply petroleum jelly or a thick moisturizer around your nails and on your fingertips. This helps create a barrier and prevents the acetone or other removal agents from drying out and irritating your skin.
3. Work in a well-ventilated area. Open windows or use a fan to circulate air and minimize inhaling fumes.
4. Avoid applying excessive force. Be gentle and patient to prevent damaging your natural nails.
5. Moisturize your nails and cuticles. Use cuticle oil, nail creams, or moisturizing hand lotions to restore hydration and promote healthy nail growth.
6. If you’re experiencing discomfort or fatigue during the removal process, take breaks. Your nails and fingertips may need a rest, especially if you’re using manual methods like filing or scraping.
7. Seek professional help from a nail tech or a salon. They have the expertise and proper tools to remove acrylic nails.
How To Care For Your Nails After Removing Acrylics
After removing acrylic nails, give your natural nails some extra care to help them recover and maintain their health. Here are some tips on how to care for your nails after removing acrylics:
- Trim and shape
- Moisturize regularly
- Avoid harsh chemicals
- Keep nails dry
- Use a nail strengthener
- Maintain a balanced diet
- Avoid nail biting or picking
- Protect your nail
- Give your nails a break from acrylic nails
- Visit a professional nail specialist
How To Protect Against Acrylic Nail Damage In Future
To protect against acrylic nail damage in the future and maintain the health of your natural nails, consider the following tips:
1. Give your natural nails a break from wearing acrylic nails. You can wear acrylic nails after 1-week break.
2. When getting acrylic nails applied or maintained, visit a professional manicurist or salon.
3. Use high-quality acrylic products that are designed for nail enhancements.
4. Do not apply acrylic nails yourself. Leave it to professionals.
5. If you choose to wear acrylic nails, follow proper maintenance routines and have them removed by a professional. Avoid picking, pulling, or forcing off the acrylic nails, as this can cause damage to your natural nails.
6. Moisturize your nails and cuticles to keep them hydrated and prevent them from becoming dry and brittle. Use cuticle oil, nail creams, or moisturizing hand lotions to nourish and protect your nails.
7. Long acrylic nails are likely to rip off real nails. So, opt for a length that is comfortable for you and that allows you to maintain your daily activities without putting excess stress on the nails.
8. Avoid using your nails as tools for opening or prying objects.
9. Ensure your diet includes a variety of vitamins, minerals, and protein to support healthy nail growth.
10. Schedule regular visits to a nail technician for maintenance, filling, or repairs.
Interesting read: When should you remove an artificial nail?
Safety Tips When Mixing Acetone
When working with acetone or any other chemical, prioritize safety to minimize the risk of accidents or exposure. Here are some safety tips to keep in mind when mixing acetone:
- Work in a well-ventilated area
- Wear protective gear
- Avoid open flames or sparks
- Use appropriate containers
- Follow proper mixing procedures
- Store acetone properly
- Handle with care
- Dispose of acetone safely
Other Post: How to Drill Holes in Acrylic Without Cracking
Does Salt Water Ruin Acrylic Nails?
Yes, salt water ruins acrylic nails.
While brief exposure to salt water may not cause immediate damage, prolonged or frequent exposure to salt water can weaken the bond between the acrylic and the natural nail, leading to lifting or breakage of the acrylic nails.
Additionally, salt water can dry out the nails and surrounding skin, causing them to become brittle and prone to damage. To protect acrylic nails while swimming in salt water, wear gloves or keep the nails out of the water as much as possible.
After swimming, moisturize the nails and cuticles to restore hydration and maintain nail health.
Read also: Can I swim with acrylic nails?
FAQs
Can I soak my acrylic nails in a bowl of nail polish remover?
No. Do not soak your acrylic nails directly in a bowl of nail polish remover. While nail polish remover contains acetone, it is not designed for extended soaking of acrylic nails.
What happens if you soak your nails too long in acetone?
Soaking your nails in acetone for too long can lead to dehydrated nail beds, skin, and cuticles. It may also cause pseudo-leukonychia (nail discolorations), onychoschizia (cracked nails), and rashes.
What removes acrylic nails?
Acrylic nails can be removed in a few different ways. The most common and least damaging way is to soak them off with acetone, which is found in many nail polish removers.
What is the fastest way to remove acrylic nails?
The fastest way to remove acrylic nails is by soaking them in an acetone-based nail polish remover. To do this, pour a small amount of the remover into a shallow bowl or container, and then place your fingertips inside for 10–15 minutes.
Where did acrylic nails originate?
Acrylic nails originated in the 1950s and gained popularity as a fashionable beauty trend. They were initially used in Hollywood to create long and glamorous nails for movie stars. Since then, acrylic nails have become widely popular and are enjoyed by many individuals.
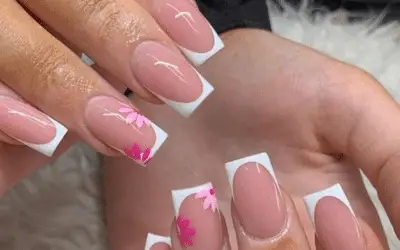
What are some suitable nail designs for minimalists?
Minimalist nail designs are perfect for those who prefer a clean and understated look. Here are some suitable nail designs for minimalists:
Nude nails with a single accent
French tip with a twist
Geometric shapes
Short square tip nails
Monochromatic nails
Negative space designs
Matte finish
Can vinegar remove acrylic nails?
Yes, vinegar can remove acrylic nails, but it is not the most effective method. Acrylic nails are best removed by a professional at a salon. Vinegar may take longer and may not dissolve the acrylic, leading to damage and weakening of the natural nails.
Conclusion
When it comes to soaking your nails in acetone, patience is key. While it may be tempting to rush the process, taking the time to properly soak your nails will yield the best results.
Remember, acetone acts as a powerful ally in removing stubborn nail polish and gel manicures, but it requires a gentle and prolonged approach.
So, wave goodbye to chipped or faded nails and embrace a fresh, clean canvas by dedicating the appropriate time to soak your nails in acetone.
Your perfectly prepped nails will thank you, and you’ll be ready to showcase your next fabulous manicure to the world.

Leave a Reply